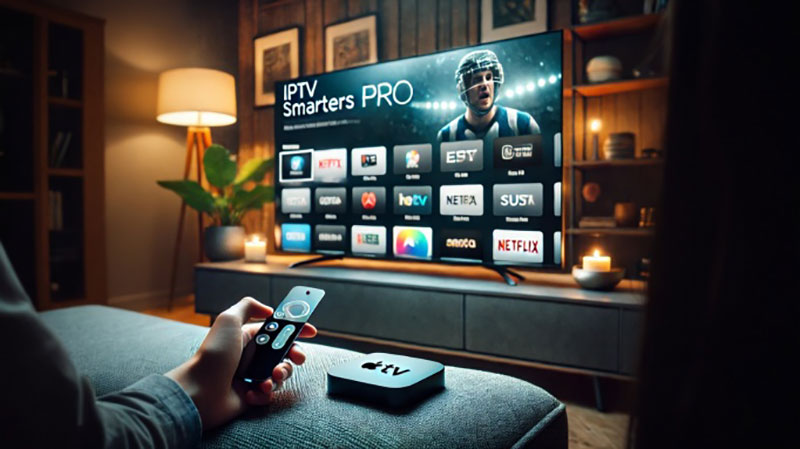
This tutorial provides step-by-step instructions to install IPTV on Roku. Using a Roku device, we must “sideload” IPTV on the Roku device. The instructions below will require the use of a computer in order to download the IPTV app file and add it to your Roku streaming device.
If you are using another IPTV player such as TiviMate, you can also watch IPTV on Roku by casting to your Roku device. IPTV Smarters is one of the best IPTV Players, compatible with hundreds of IPTV services that use a server URL.
Don’t worry, the process is easier than it sounds. Let’s begin.
You can enter the term “smarters player” into the “search channel” bar to download this app for your Roku
Step 1. Open the player
Step 2. Enter your login details
Step 3. Click on Login
Great Premium IPTV Subscription
Great IPTV is Premium IPTV provider with more than 12,000 channels and more than 9,700 VOD a private server using +10Gbps Network, we at Great IPTV are looking forward to Help All IPTV Users to enjoy their IPTV Subscription, we have Premium IPTV Subscription Which you can BUY Great IPTV Premium Subscription From Here
Formuler is one of the devices that has gained a lot of popularity among IPTV users in recent years. At present, the Z series of this device has been provided to customers with suitable facilities, which has also had good sales.
To use the IPTV service on your Formuler device, you need to have an IPTV service, which GreatIPTV provides you with a quality service without freez. Click here to see prices and services.
As you know there are three famous apps on the Formuler in order to use IPTV service .
1 . MyTVOnline
2. MyTVOnline 2
Obviously, MyTvOnline 2 is newer and better compatible with IPTV services. In some old Formuler devices, only the MyTVOnline app is available, and in some Formulers, you just need to update your device to see MyTVOnline 2.
Step 1. Open the My TV online app and get the MAC address. Then you can add Mac address on the panel or give us your MAC
Step 2. Click on Add portal
Step 3. You can enter the portal we provide to login. And you also need to edit “Portal name”
Step 4. Hit on “Connect”. Then you can wait until the playlist is loaded
Great Premium IPTV Subscription
Great IPTV is Premium IPTV provider with more than 12,000 channels and more than 9,700 VOD a private server using +10Gbps Network, we at Great IPTV are looking forward to Help All IPTV Users to enjoy their IPTV Subscription, we have Premium IPTV Subscription Which you can BUY Great IPTV Premium Subscription From Here
5 Best IPTV Players For Windows PC For 11, 10, 8, 7 In 2023
What is IPTV?
It is a service or application that allows your computer to stream a range of multimedia content through Internet Protocol (IP) networks.
IPTV provides better resolution, quality, and more channels than any general Cable TV.
You can purchase an IPTV subscription and enjoy watching live media, video on demand, and TV channels.
So, if you are planning to stream TV channels online or buy an IPTV subscription for bonus content, here are some of the best Windows IPTV Player options you have in hand.
These IPTV players provide better support for audio/sound/Video tuning, encoding/decoding, various file formats, and codecs/add-ons support.
Top 5 IPTV Apps For Windows 11, 10 & Older Versions To Use
Here is the list of top IPTV players for Windows 11, 10, 8, 7 PC:
1. VLC for Windows
VLC is an open source free cross-platform multimedia player and framework. It supports all multimedia file formats and various streaming protocols. This player runs efficiently on all Windows versions.
It is one of the best IPTV players for Windows 11 as it offers powerful streaming features to run all multimedia content. This is a perfect player for your PC as it is free of spyware, ads, and tracking. Thus, you can enjoy your favorite content online without security and privacy concerns.
2. MyIPTV Player
MyIPTV Player is a powerful media player with EPG to play your IPTV channels efficiently. It allows you to load m3u playlist from local storage or remote source. MPEG TS and HTTP Live Streaming (HLS) support automatically group channels based on channel data, making it one of the best IPTV for PC to use in 2023.
It offers multiple recording options for IPTV channels and comes with built-in EPG support. Download MyIPTV Player to enjoy video on demand (VOD) and access history for VOD files.
With multiple channel filtering options and PIN protection, this advanced Windows IPTV player ensures your digital content remains secure. It also works as an efficient M3U player for Windows.
3. Perfect Player Windows
Use this free best IPTV player for Windows to enjoy your favorite digital content right on your PC. This advanced full-featured IPTV/Media player comes with an efficient semi-transparent OSD and the option to control and manage to play in full screen.
Perfect Player Windows offers multilingual support ,including English, Spanish, Russian, Greek, Portuguese ,and Ukrainian language support. It offers a scalable OSD option where OSD menus and Videos render perfectly with any screen size and resolution.
This IPTV for Windows 10 supports streaming m3u, XSPF, and EPG playlists without any hiccups.
4. IPTV Smarters for PC
IPTV Smarters App is now available for Windows to offer seamless experience to watch Live TV, movies, series, and videos on demand.
IPTV Smarters is one of the best IPTV players for Windows that works on an advanced application based Xtream Codes. It supports all Windows versions, including 32 and 64 bit.
To use IPTV Smarters, you simply need to enter your username, password and server URL with port to enjoy the IPTV services.
5. Kodi Player
Another IPTV player that you can choose is Kodi, which plays your local media, videos on demand, and digital channels. That said, it is imperative to note that while it has an array of third-party add-ons, some of them are not legal to use.
Therefore, we recommend that you go over its add-ons before installation. In addition, you can choose a VPN service to protect your privacy when using Kodi.
It also allows users to play and view most streaming media, such as videos, music, podcasts, and videos from the internet
Some of its features are as follows:
Allows both online and offline streaming through different devices
Supports several plugins and add-ons for personalization
Manages local media files with ease, supporting different video formats.
Great Premium IPTV Subscription
Great IPTV is Premium IPTV provider with more than 12,000 channels and more than 9,700 VOD a private server using +10Gbps Network, we at Great IPTV are looking forward to Help All IPTV Users to enjoy their IPTV Subscription, we have Premium IPTV Subscription Which you can BUY Great IPTV Premium Subscription From Here
Set IPTV is a premium IPTV player for watching your IPTV subscription in HD streaming quality. You can access IPTV playlists in various formats on this app. It is compatible with all popular streaming devices. Users should activate the IPTV player before watching IPTV content. Also, they offer support for trouble-free streaming. The best part of the IPTV app is its customization options for streaming.
How to Set Up Set IPTV on Firestick
Turn on your Fire TV device and click on the Find option from the menu.
Select the Search tile and search for the Downloader in the search bar.
Click on Get to download and install the app from the Amazon App Store.
After installation, get back to the home screen and click on the Settings.
Go to My Fire TV >> Developer Options >> Install Unknown Apps >> Downloader >> Turn on.
Now, launch the Downloader app.
Enter the Set IPTV download link and click the Go button to download and install the IPTV app.
Open the IPTV app and note down the Mac address that appears on the screen.
Then, go to the Set IPTV Activation website.
Enter the Mac address in the asked field and click on the Check icon.
Great Premium IPTV Subscription
Great IPTV is Premium IPTV provider with more than 12,000 channels and more than 9,700 VOD a private server using +10Gbps Network, we at Great IPTV are looking forward to Help All IPTV Users to enjoy their IPTV Subscription, we have Premium IPTV Subscription Which you can BUY Great IPTV Premium Subscription From Here
1. Select the Settings in the Main Screen settings line.
2. In the Device line, select the Apps.
3. Select an application which cache you would like to clear.
4. Select Clear cache.
5. Select ОК to confirm clearing.
Great Premium IPTV Subscription
Great IPTV is Premium IPTV provider with more than 12,000 channels and more than 9,700 VOD a private server using +10Gbps Network, we at Great IPTV are looking forward to Help All IPTV Users to enjoy their IPTV Subscription, we have Premium IPTV Subscription Which you can BUY Great IPTV Premium Subscription From Here
Its one of multiple platform support application to run your IPTV subscription contents. Duplex IPTV have easy to use interface and easy IPTV installation.
Most important feature are:
1- Multiple favorite lists
2- EPG support
3- Fast zapping
4- Small Preview beside channels list
5- Channels list over channel screen .
6- Parent Control
Install Duplex IPTV
This IPTV application available for many different operating systems and devices :
After installing application , Open it and you will see the Device ID and Device key (You can find it by choose activation tab too)
2. Login into Duplex IPTV management portal
Navigate to edit.duplexiptv.com and Enter Device ID and Device key you noted in step 1 , Then click on Manage Device
3. Add XC Playlist
You can add playlist via both method M3u Link and Xtream connection , We recommend to connect via XC (xtream) playlist.
and Fill your Xtream connection details which you must give from your IPTV provider , If you have not click here to place IPTV subscription now. Playlist Name: You can set any name for your playlist.
Enter Username , Password and Host (Server URL of xtream connection). Activate Captcha and click on Save.
4. Refresh Playlists in application
Then back to Duplex IPTV application and choose Refresh to reload Playlists , Then the playlist name must appears .
Great Premium IPTV Subscription
Great IPTV is Premium IPTV provider with more than 12,000 channels and more than 9,700 VOD a private server using +10Gbps Network, we at Great IPTV are looking forward to Help All IPTV Users to enjoy their IPTV Subscription, we have Premium IPTV Subscription Which you can BUY Great IPTV Premium Subscription From Here
You can modify the setting of the VLC media player, which can finally help you watch IPTV with less buffering by increasing the cache size. In the following, some of these tips are mentioned.
How to optimize VLC for watching IPTV?
Step 1: Open the VLC media player, select “Tools“, and click “Preference“.
Step 2: Next, click “All” under the “Show Settings” option at the bottom of the window. Click “Input / Codecs” in the left sidebar.
Step 3: If the file that is buffering is playing from a local hard drive, look for the “File Caching (ms)” option under “Advanced” on the right side. The caching value here is estimated in milliseconds, so setting the value to 1000 will buffer for 1 second. The issue with setting this option too large is that if you want to skip to a new point in the file manually, there will be a larger lag while the content is buffered again.
If the file you are trying to play is located on a network share, you can change the caching value for “Network Caching (ms)”.
Cache size in VLC
Another temporary solution when you are running a network URL format or streaming files like TS and M3U file formats is explained below:
Open the VLC media player, click on “Media” and select “Open Network Stream“.
Type the URL you want to play, then click on the “Show More Options” checkbox.
Now, based on your Internet speed you can increase the cache size.
Great Premium IPTV Subscription
Great IPTV is a Premium IPTV provider with more than 12,000 channels and more than 9,700 VOD on a private server using a +10Gbps Network, we at Great IPTV are looking forward to Helping All IPTV Users enjoy their IPTV Subscription, we have Premium IPTV Subscription Which you can BUY Great IPTV Premium Subscription From Here
Common Reasons Why You Need to Clear Cache Data on Samsung TV
Do you need to clear the cache on your Samsung Smart TV? Clearing the cache on your electronic devices can help make them run faster, protect them from malware and viruses, and improve app performance. You’ve probably heard about how to clear the cache on your web browsers, computers, and mobile phones. But how do you clear the cache on your smart TV? You may be able to clear your cache data by performing a soft reset on your TV. If that doesn’t work, you can easily clear your cache in the Settings menu. The process may vary depending on what model your TV is.
What Is A Cache?
Caches are simply temporary storage locations for frequently-used data. This is done to expedite the time it takes for a computer or other machine to access certain information. Think of caches like short cuts – once a cache is created, your device knows exactly where to look instead of taking additional time to search the web or hard drive again. Caches can be beneficial in saving on processing power and making sure your device runs more efficiently.
What Does Clear Cache Mean?
The cache on your Samsung TV is a space where the TV stores temporary data from apps and websites that you access. This data is intended to make those apps and websites run faster and more efficiently, but over time, the cache can become cluttered and cause problems.
How To Clear Cache On Samsung TV?
Here are 11 ways to clear the cache on your Samsung TV:
1 | Restart your TV
Sometimes, simply restarting your TV can clear the cache and resolve any issues that you’re experiencing. To do this, unplug the power cord from the back of your TV, wait 30 seconds, and then plug it back in.
2 | Update your TV’s software
Your Samsung TV may have a software update available that includes bug fixes and performance improvements. Updating your TV’s software can also help to clear the cache and improve its performance. To check for updates, go to your TV’s settings and select “Software Update.”
3 | Clear the app cache
Many of the problems that can be caused by a cluttered cache can be resolved by clearing the app cache. To do this, go to your TV’s settings and select “Apps.” From there, you can select the app that you want to clear the cache for and choose “Clear Cache.”
4 | Clear the browser cache
If you use your Samsung TV to access the internet, you can also clear the cache in your TV’s built-in browser. To do this, open the browser and go to the “Settings” menu. From there, you can select “Clear Browsing Data” and choose to clear the cache.
5 | Clear the cache in individual apps
Some apps, such as Netflix, have their own options for clearing the cache. To clear the cache in these apps, you can usually find the option in the app’s settings or in the app’s menu.
6 | Reset your TV to factory settings
If none of the above methods work, you can try resetting your TV to its factory settings. This will erase all of the data on your TV, including the cache, and restore it to its default state. To do this, go to your TV’s settings and select “Support,” then “Self Diagnosis,” and finally “Reset.”
7 | Use a cache cleaning app
There are several apps available on the Samsung TV app store that can help you clear the cache on your TV. These apps can be especially useful if you’re not sure how to clear the cache manually.
8 | Clear the cache in the Smart Hub
The Smart Hub is the main menu on your Samsung TV, where you can access all of your TV’s apps and features. To clear the cache in the Smart Hub, go to the Smart Hub, select “Settings,” and choose “Clear Cache.”
9 | Uninstall and reinstall apps
If you’re having problems with a specific app, you can try uninstalling it and then reinstalling it. This can help to clear any corrupted data that may be causing the app to function improperly. To do this, go to your TV’s settings and select “Apps,” then choose the app that you want to uninstall and select “Uninstall.”
10 | Use a USB drive to clear the cache
If you have a USB drive, you can use it to clear the cache on your Samsung TV. To do this, save the cache cleaning app that you want to use to your USB drive, and then plug the USB drive into your TV. You can then run the app from the USB drive to clear the cache.
11 | Use a different internet connection
If you’re having problems with your TV’s internet connection, you can try using a different connection, such as a different Wi-Fi network.
Can This Improve My Screen Mirroring Experience?
Yes, clearing the cache on your Samsung smart TV can improve your screen mirroring experience. The cache on your TV is a space where the TV stores temporary data from apps and websites that you access. Over time, this data can become cluttered and cause problems, such as slow performance or connectivity issues. By clearing the cache, you can remove this cluttered data and improve the overall performance of your TV, including the screen mirroring feature. This can help to reduce lag and improve the overall quality of the mirrored content.
Are you using screen mirroring apps from AirBeamTV? Then clearing the cache on your devices can sometime be beneficial. This includes clearing the cache on your phone, if that is the place where the screen mirroring app is installed.
Great Premium IPTV Subscription
Great IPTV is Premium IPTV provider with more than 12,000 channels and more than 9,700 VOD a private server using +10Gbps Network, we at Great IPTV are looking forward to Help All IPTV Users to enjoy their IPTV Subscription, we have Premium IPTV Subscription Which you can BUY Great IPTV Premium Subscription From Here
FireStick lets you download and use a wide range of apps for streaming and other purposes. You can install these apps from Amazon App Store.
Almost all the FireStick apps create a cache, which is saved on your device storage. The cache file is created when the app is running. It is supposed to be temporary and delete itself when the app is closed. However, this is not always the case. The cache files continue to accumulate and over time occupy sizeable storage space.
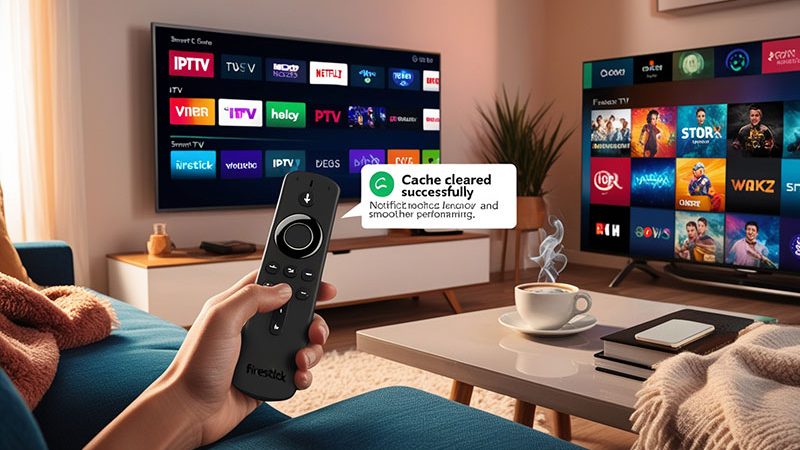
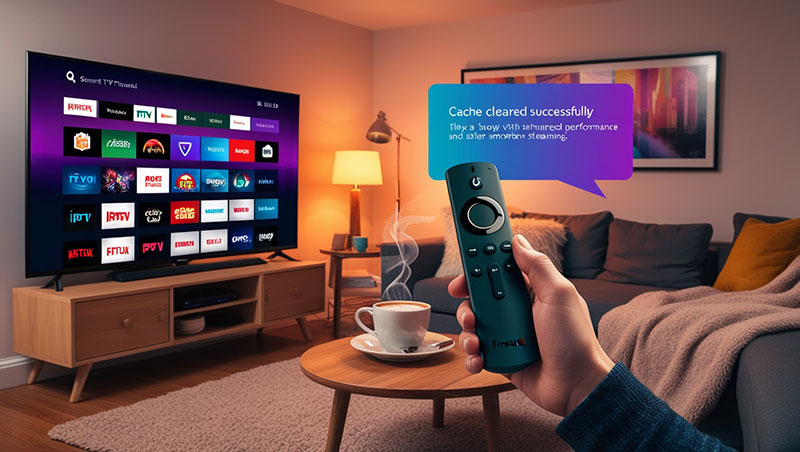
The following tutorial will show you How to Clear Cache on Firestick & Fire TV and enjoy smoother playback on your device.
This process will take less than a minute and can be accomplished in only 3 simple steps which we provide screenshots for below.
Clearing the Cache on your Firestick device is a great way to improve the overall device performance and boost your streaming experience.
Users can easily clear the cache for any Firestick App installed including those which have been sideloaded.
However, this will also work for any variation of Firestick including Firestick Lite and Fire TV Cube.
In the guide below, we will clear cache on Firestick by clearing various Streaming Apps.
This will reset the app itself and remove/clean up junk files, history, and more for the application.
Users are unable to clear cache on the firestick device itself, however, the best way to refresh the entire device is by restarting it using the guide below.
If you are still encountering slow speeds and issues, we suggest a factory reset which will wipe your device completely and return it to its original state.
How to Clear Cache on Firestick/Fire TV
In the guide below, we will clear cache on Firestick for the Downloader Application.
Downloader is used by millions of cord-cutters to install various apps and APKs that are not available within the Amazon App Store.
1. From the home screen of your device, hover over Settings and choose Applications.
2. Click Manage Installed Applications.
3. Find the app you wish to clear cache for and select it.
4. Scroll down and click clear cache.
5. You can also select clear data to reset/refresh your preferred app completely.
6. Click clear data again.
That’s it!
You have successfully cleared the cache for an app on your firestick device.
Great Premium IPTV Subscription
Great IPTV is Premium IPTV provider with more than 12,000 channels and more than 9,700 VOD a private server using +10Gbps Network, we at Great IPTV are looking forward to Help All IPTV Users to enjoy their IPTV Subscription, we have Premium IPTV Subscription Which you can BUY Great IPTV Premium Subscription From Here
In this tutorial, we are going to show you how to change the DNS on your IPTV devices such as MAG, different Smart TVs, Android, and iOS. Changing your DNS settings is usually mentioned as one of the simplest ways to optimize your internet speed and solve many issues you might encounter while streaming IPTV channels. What is Internet streaming?
DNS servers play a major role in IPTV streaming. While there are no mandatory tasks to improve internet speeds, we can make many smaller tweaks and improvements. These improvements work together to increase our overall internet speed and the DNS servers play an essential role. What is IPTV?
Before you change to any DNS address, make sure you write down your current DNS address so you can keep these numbers in case you need to get back to your original settings.
If your original settings were set to “Automatic”, just change your DNS settings back to “Automatic”. This applies to all the devices mentioned in this article.
How to change DNS on a Samsung Smart TV
Step 1: Press the “Menu” button on your remote control. Under “Settings menu” select “Network” (1) then choose “Network Status”.
Step 2: After a few seconds you will see 3 buttons. Select the “IP Settings” and proceed to the next step.
DNS Addresses:
Cloudflare DNS: 1.0.0.1 or 1.1.1.1
Google DNS: 8.8.8.8 or 8.8.4.4
Open DNS: 208.67.222.222 or 208.67.220.220
DNS Watch: 82.200.69.80 or 84.200.70.40
Restart your Samsung Smart TV to allow the configuration to take effect.
How to change DNS on a LG Smart TV
Step 1: Press the Menu button on your remote control Select “Settings” and select “All settings”.
Step 2: Scroll down to the “Network” submenu and select “Network Connection” and press on “Set Expert“.
Step 3: Under “IP Mode” press “Dynamic”. Under “DNSServer” choose “Manual”.
Now enter the below DNS Address and click “OK “.
DNS Addresses:
Cloudflare DNS: 1.0.0.1 or 1.1.1.1
Google DNS: 8.8.8.8 or 8.8.4.4
Open DNS: 208.67.222.222 or 208.67.220.220
DNS Watch: 82.200.69.80 or 84.200.70.40
Restart your LG Smart TV to allow the configuration to take effect.
How to change DNS on a Sony Smart TV
Step 1: Press the “Home” button on your remote. Select Setup and press on Network.
Step 2: Press on “Network Setup”.
Step 3: Select “Expert”.
Step 4: Choose “Wi-Fi” or “Wired LAN” depending on your connection.
Step 5: Choose “Status Info”.
Step 6: Write down your” IP address”.
Step 7: Go back to the network and choose “Advanced options”.
Step 8: Press or click on “IP settings”.
Step 9: Now Select “Static”.
Step 10: Enter the first three groups of numbers of your IP address. For instance, if your IP address is “192.166.1.1″, enter “192.166.1.”. For the fourth group of numbers, you can enter “50” so the final IP address will look like “192.166.1.50” and click on “Next”
Step 11: For the “Gateway” enter the full IP address of your router and click on “Next”.
Step 12: Enter “24” for the “Network Prefix Length” then click on “Next”.
Step 13: Enter your Preferred DNS and click on “Next”.
Step 14: For DNS 2 enter one of the Alternate DNS addresses and click on “Next”.
Press “OK” and you are done.
DNS Addresses:
Cloudflare DNS: 1.0.0.1 or 1.1.1.1
Google DNS: 8.8.8.8 or 8.8.4.4
Open DNS: 208.67.222.222 or 208.67.220.220
DNS Watch: 82.200.69.80 or 84.200.70.40
Restart your Sony Smart TV to allow the configuration to take effect.
How to change DNS on a Apple TV device
Step 1: Press or click on the “Settings” menu on your Apple TV device and select “Network”.
Step 2: Now click on the “Network”.
Step 3: Click on “Wi-Fi”.
Step 4: Choose your Wi-Fi Connection.
Step 5: Scroll down and select the “Configure DNS” option.
Step 6: Choose “Manual” when you are asked to choose between Manual or Automatic.
Step 7: In the DNS field pls enter the DNS Server address. Important! You should enter 3 digits for each cluster.
I.E. for DNS 1.11.111.123 you should enter 001.011.111.123. Click “Done”
Step 8: Your Smart DNS is set up, and nearly done, For that, go back to “Settings” and select “General”.
Step 9: Find the “Region Format” option and press on it.
Step 10: Select for Example “The United States” from the list of options.
Go back to the main screen and select “Settings”. Use the “Sleep Now” command.
Unplug the Apple TV power cord and wait 10 seconds. Then plug the Apple TV back in.
DNS Addresses:
Cloudflare DNS: 1.0.0.1 or 1.1.1.1
Google DNS: 8.8.8.8 or 8.8.4.4
Open DNS: 208.67.222.222 or 208.67.220.220
DNS Watch: 82.200.69.80 or 84.200.70.40
Restart your Apple TV to allow the configuration to take effect.
How to change DNS on a iPhone
Step 1: Go to “Settings”.
Step 2: Choose the network that you are using.
Step 3: In the DNS field enter the DNS Server addresses.
DNS Addresses:
Cloudflare DNS: 1.0.0.1 or 1.1.1.1
Google DNS: 8.8.8.8 or 8.8.4.4
Open DNS: 208.67.222.222 or 208.67.220.220
DNS Watch: 82.200.69.80 or 84.200.70.40
Step 4: Go back to Wi-Fi to save your changes.
How to change DNS on a iPad
Step 1: Go to your iPad settings. Now click on “Wi-Fi” and select the network you are connected to.
Step 2: In the DNS field enter the DNS Server address. Tap on “Wi-Fi” from the upper left corner to save your settings.
DNS Addresses:
Cloudflare DNS: 1.0.0.1 or 1.1.1.1
Google DNS: 8.8.8.8 or 8.8.4.4
Open DNS: 208.67.222.222 or 208.67.220.220
DNS Watch: 82.200.69.80 or 84.200.70.40
Step 3: Go back to Wi-Fi to save your changes.
How to change DNS on a Android device
Step 1: Go to “Settings”.
Step 2: Select “Wi-Fi” and Press and hold active wireless network until a dialog pops up.
Step 3: Press on “Modify network config”.
Step 4: Check “Show advanced options”.
Step 5: Change “IP settings” to “Static”.
Step 6: In the “DNS 1” and “DNS 2” fields enter the DNS Server address and Press on “Save”.
DNS Addresses:
Cloudflare DNS: 1.0.0.1 or 1.1.1.1
Google DNS: 8.8.8.8 or 8.8.4.4
Open DNS: 208.67.222.222 or 208.67.220.220
DNS Watch: 82.200.69.80 or 84.200.70.40
Restart your device and Enjoy.
How to change DNS on a MAG device
Step 1: Go to “Settings”.
Step 2: Now select “System Settings”.
Step 3: Now choose Network and press on “Auto (DHCP), manual DNS“.
DNS Addresses:
Cloudflare DNS: 1.0.0.1 or 1.1.1.1
Google DNS: 8.8.8.8 or 8.8.4.4
Open DNS: 208.67.222.222 or 208.67.220.220
DNS Watch: 82.200.69.80 or 84.200.70.40
Restart your device and Enjoy.
Let us know in the comments section below about your opinion and feedback concerning this article. Thank you in advance.
Great Premium IPTV Subscription
Great IPTV is Premium IPTV provider with more than 12,000 channels and more than 9,700 VOD on a private server using +10Gbps Network, we at Great IPTV are looking forward to Help All IPTV Users to enjoy their IPTV Subscription, we have Premium IPTV Subscription Which you can BUY Great IPTV Premium Subscription From Here