Tag: great Premium IPTV

How to Update Your Streaming App?

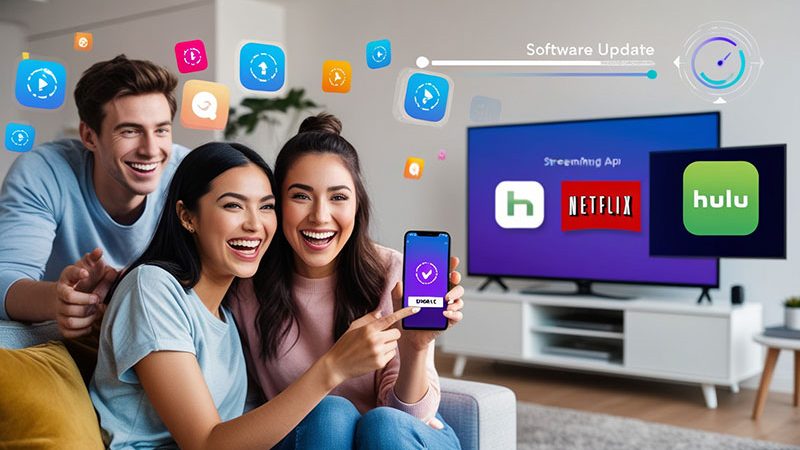
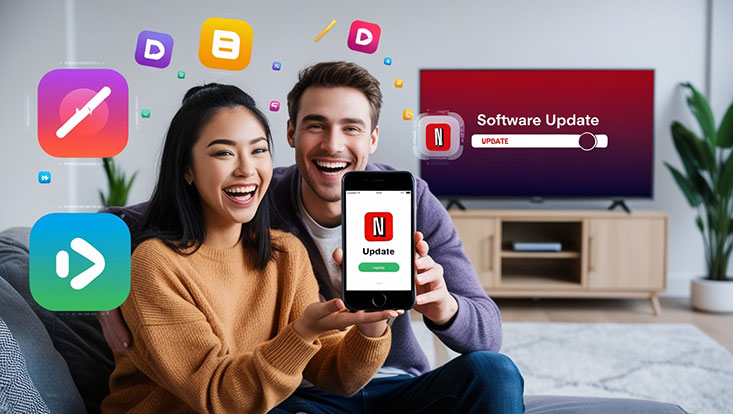
Keeping your streaming app updated ensures you enjoy the latest features, improved performance, and enhanced security. Whether you’re using Netflix, Hulu, Disney+, or another streaming service, updating your app is simple. This guide explains how to update your streaming app on various devices, including smartphones, smart TVs, and streaming devices like Roku or Fire Stick.

Why Should You Update Your Streaming App?

Regular updates fix bugs, improve streaming quality, and introduce new features like personalized recommendations or offline viewing. Outdated apps may lag, crash, or fail to load content, impacting your viewing experience. By staying current, you ensure compatibility with your device and access to the latest shows and movies.

Buy 1 Year IPTV Subscription and Enjoy Unlimited Content

How to Update Your Streaming App on Different Devices

Follow these device-specific steps to update your streaming app effortlessly.

1. Update Streaming Apps on Smartphones and Tablets (iOS and Android)

For iPhone, iPad, or Android devices, app updates are managed through the App Store or Google Play Store.

  • Step 1: Open the App Store (iOS) or Google Play Store (Android).
  • Step 2: Search for your streaming app (e.g., Netflix, Hulu).
  • Step 3: If an update is available, tap Update. If not, the button will show Open.
  • Step 4: Wait for the update to download and install. Open the app to confirm it’s working.

Tip: Enable auto-updates to keep apps current without manual checks. Go to Settings > App Store (iOS) or Google Play Store > Settings > Auto-update apps (Android).

2. Update Streaming Apps on Smart TVs

Smart TVs from brands like Samsung, LG, or Sony have their own app stores.

  • Step 1: Navigate to your TV’s App Store or Apps section from the home menu.
  • Step 2: Find your streaming app using the search function.
  • Step 3: Select the app and choose Update if available. Some TVs auto-update apps when connected to the internet.
  • Step 4: Launch the app to ensure it’s updated.

Note: Ensure your TV is connected to Wi-Fi for updates. Check your TV’s manual for specific instructions, as interfaces vary.

3. Update Streaming Apps on Streaming Devices (Roku, Fire Stick, Apple TV)

Devices like Roku, Amazon Fire Stick, and Apple TV require updates through their respective app stores.

  • Roku:
    • Go to Home > Settings > System > System Update to check for updates.
    • Alternatively, highlight the app on the home screen, press the Star (*) button, and select Check for updates.
  • Amazon Fire Stick:
    • Navigate to Home > My Apps, highlight the app, press the Menu button, and select Update if available.
    • Enable auto-updates via Settings > Applications > Appstore > Automatic Updates.
  • Apple TV:
    • Open the App Store, find the app, and click Update if prompted.
    • Turn on auto-updates in Settings > Apps > Automatically Update Apps.

4. Update Streaming Apps on Gaming Consoles (PS4, PS5, Xbox)

Gaming consoles like PlayStation and Xbox support streaming apps.

  • Step 1: Go to the console’s Store or Library (e.g., PlayStation Store, Microsoft Store).
  • Step 2: Locate the streaming app and select Update if available.
  • Step 3: Install the update and launch the app.

Tip: Ensure your console is online, as updates won’t download without an internet connection.

Troubleshooting Common Update Issues

If your streaming app won’t update, try these fixes:

  • Check Internet Connection: A stable Wi-Fi or Ethernet connection is required.
  • Clear Cache: Go to your device’s settings, find the app, and clear its cache.
  • Restart Device: Power off and restart your device to refresh the system.
  • Uninstall and Reinstall: Delete the app and reinstall it from the app store to get the latest version.
  • Update Device Firmware: Ensure your device’s operating system is up to date, as older firmware may block app updates.

How to Enable Auto-Updates for Streaming Apps

To avoid manual updates, enable auto-updates on your device:

  • iOS: Settings > App Store > Enable App Updates.
  • Android: Google Play Store > Settings > Auto-update apps > Choose Over Wi-Fi only or Any network.
  • Smart TVs/Streaming Devices: Check the app store or system settings for auto-update options.
  • Consoles: Enable auto-updates in the console’s system settings.

Final Thoughts

Updating your streaming app is quick and ensures a seamless entertainment experience. Whether you’re on a smartphone, smart TV, or streaming device, follow these steps to stay current. For persistent issues, contact the streaming service’s support team or check their official website for device-specific guidance.

Stay tuned to your favorite shows with the latest app versions, and enjoy uninterrupted streaming!


Frequently Asked Questions (FAQs)

1. Why is my streaming app not updating?

Answer: Check your internet connection, clear the app’s cache, or reinstall the app.

2. How do I know if my streaming app needs an update?

Answer: Visit your device’s app store; an Update button indicates a new version is available.

3. Can I use a streaming app without updating it?

Answer: Yes, but outdated apps may lag, crash, or miss new features.

4. How do I update my streaming app on a smart TV?

Answer: Go to the TV’s app store, find the app, and select Update.

5. Do streaming app updates cost money?

Answer: No, app updates are free, but you need an active subscription for premium content.

How to Clear Cache on IPTV Smarters Pro App

IPTV Smarters Pro is a popular app for streaming IPTV content on devices like Android, Firestick, iOS, and Smart TVs. However, over time, the app’s cache can accumulate, leading to issues like slow performance, EPG not loading, or graphical glitches. Clearing the cache can resolve these problems and ensure smooth streaming. In this SEO-optimized guide, we’ll walk you through how to clear the cache on IPTV Smarters Pro, why it’s important, and answer common questions.

Why Clear Cache on IPTV Smarters Pro?

Cache is temporary data stored by apps to speed up processes, such as loading thumbnails or channel lists. While this improves performance, a cluttered or corrupted cache can cause:

  • App crashes or freezes: Corrupted cache files can destabilize the app.
  • EPG malfunctions: Outdated cache may prevent the Electronic Program Guide from loading.
  • Picons not displaying: Channel icons may fail to appear.
  • Slow performance: Excessive cache can bog down the app.

Regularly clearing the cache keeps IPTV Smarters Pro running smoothly without affecting your settings or login details. Note that clearing cache won’t fix buffering issues, which are often related to internet speed or device performance.

Top Recommendation:
Discover the ultimate entertainment solution with 7 Days Great IPTV Subscription, designed just for you

How to Clear Cache on IPTV Smarters Pro: Step-by-Step

The process to clear cache varies slightly depending on your device. Below are instructions for the most common platforms: Android, Firestick, and within the app itself.

Method 1: Clear Cache on Android Devices

  1. Open Settings: Go to your device’s “Settings” menu.
  2. Navigate to Apps: Select “Apps” or “Applications” (wording may vary).
  3. Find IPTV Smarters Pro: Scroll through the app list and tap on “IPTV Smarters Pro.”
  4. Access Storage: Tap “Storage” or “Storage & Cache.”
  5. Clear Cache: Select “Clear Cache” to remove temporary files. Confirm if prompted.
  6. Restart the App: Reopen IPTV Smarters Pro to check if the issue is resolved.

Note: Avoid selecting “Clear Data,” as this will reset your app preferences and log you out.

Method 2: Clear Cache on Firestick

  1. Go to Settings: From the Firestick home screen, select “Settings.”
  2. Select Applications: Choose “Manage Installed Applications.”
  3. Locate IPTV Smarters Pro: Find and select “IPTV Smarters Pro” from the list.
  4. Clear Cache: Click “Clear Cache” (not “Clear Data” to avoid resetting settings).
  5. Force Stop (Optional): Select “Force Stop” to ensure the app restarts fresh.
  6. Reboot Firestick: Restart your Firestick and launch the app to test performance.

Method 3: Clear Cache Within IPTV Smarters Pro

Some versions of IPTV Smarters Pro allow clearing cache directly in the app:

  1. Open the App: Launch IPTV Smarters Pro.
  2. Access Settings: Click the gear icon on the dashboard to open “Settings.”
  3. Find Clear Cache Option: Look for “Clear Cache” or “Auto Clear Cache” in the General Options.
  4. Clear Cache: Select “Clear Now” to remove the cache manually. If “Auto Clear Cache” is enabled, the app clears cache automatically each time it closes.
  5. Test the App: Check if the issue (e.g., EPG or picons not loading) is fixed.

Tips to Optimize IPTV Smarters Pro Performance

  • Enable Auto Clear Cache: If available, check the “Auto Clear Cache” option in the app settings to prevent cache buildup.
  • Update the App: Ensure you’re using the latest version of IPTV Smarters Pro to avoid bugs. Check for updates on the app store or official website.
  • Check Internet Connection: A stable connection (at least 10 Mbps for HD streaming) is crucial for seamless performance.
  • Reinstall if Necessary: If clearing cache doesn’t work, uninstall and reinstall the app, but note you’ll need to re-enter login credentials.
  • Use a VPN: Some ISPs block IPTV services, causing issues. A VPN can help maintain access and privacy.

When to Clear Cache?

Clear the cache if you notice:

  • App freezes or crashes.
  • EPG or channel lists not loading properly.
  • Picons or thumbnails missing.
  • General sluggishness in the app.

Clearing cache is a quick, safe troubleshooting step that doesn’t delete your account or subscription data.

Conclusion

Clearing the cache on IPTV Smarters Pro is a simple yet effective way to fix common issues like app crashes, EPG malfunctions, or slow performance. Whether you’re using Android, Firestick, or the in-app option, the steps are straightforward and take just a minute. Regular cache maintenance, combined with a stable internet connection and app updates, ensures a seamless streaming experience. Try these steps today to keep your IPTV Smarters Pro app running at its best!

FAQs

  1. Will clearing cache log me out of IPTV Smarters Pro?
    No, clearing cache only removes temporary files and won’t affect your login or settings.
  2. How often should I clear the cache?
    Clear the cache every few weeks or when you notice performance issues like crashes or EPG not loading.
  3. Does clearing cache fix buffering issues?
    No, buffering is usually caused by internet speed or provider issues, not cache.
  4. What’s the difference between “Clear Cache” and “Clear Data”?
    “Clear Cache” removes temporary files; “Clear Data” resets the app, including settings and login info.
  5. Can I clear cache on iOS devices?
    iOS doesn’t offer a direct “Clear Cache” option. You may need to uninstall and reinstall the app to clear cache.

How to Update Firmware of PS5: A Step-by-Step Guide

Keeping your PlayStation 5 (PS5) firmware up to date is essential for optimal performance, enhanced security, and access to the latest features. Firmware updates fix bugs, improve system stability, and sometimes introduce new functionalities. In this SEO-optimized guide, we’ll walk you through how to update your PS5 firmware easily, whether automatically or manually, ensuring your console stays in top shape.

Why Update Your PS5 Firmware?

Regular firmware updates ensure your PS5 runs smoothly and securely. Sony releases updates to:

  • Enhance system performance and stability.
  • Fix software bugs and glitches.
  • Add new features, such as improved user interfaces or expanded compatibility.
  • Strengthen security to protect your console and data.

By keeping your firmware current, you can enjoy a seamless gaming experience and avoid potential issues.

Buy 1 Year IPTV Subscription and Enjoy Unlimited Content

How to Update PS5 Firmware: Two Methods

There are two primary ways to update your PS5 firmware: automatic updates via the internet or manual updates using a USB drive. Below, we outline both methods step-by-step.

Method 1: Automatic Firmware Update (Recommended)

The easiest way to update your PS5 is through an automatic internet connection. Follow these steps:

  1. Connect to the Internet
    Ensure your PS5 is connected to a stable Wi-Fi or Ethernet connection.
  2. Go to Settings
    From the PS5 home screen, navigate to the Settings icon (gear) in the top-right corner.
  3. Select System
    In the Settings menu, scroll down and select System.
  4. Choose System Software
    Under System, select System Software > System Software Update and Settings.
  5. Check for Updates
    Select Update System Software. If an update is available, your PS5 will download and install it automatically.
  6. Restart Your PS5
    Once the update is complete, your console may restart to apply the changes.

Pro Tip: Enable automatic updates to ensure your PS5 stays current without manual intervention. In the System Software Update and Settings menu, toggle on Download Update Files Automatically and Install Update Files Automatically.

Method 2: Manual Firmware Update via USB

If your PS5 isn’t connected to the internet or you prefer manual updates, you can use a USB drive. Here’s how:

  1. Prepare a USB Drive
    Use a USB drive with at least 1GB of free space, formatted in FAT32 or exFAT.
  2. Create a Folder Structure
    On your computer, create a folder named PS5 on the USB drive. Inside it, create another folder named UPDATE.
  3. Download the Firmware File
    Visit the official PlayStation website (www.playstation.com) and go to the PS5 support section. Download the latest PS5 system software update file (named PS5UPDATE.PUP) and save it to the UPDATE folder on your USB drive.
  4. Safely Eject the USB
    Eject the USB drive from your computer and plug it into one of your PS5’s USB ports.
  5. Access Safe Mode
    Turn off your PS5 completely. Then, press and hold the power button until you hear a second beep (about 7 seconds) to enter Safe Mode.
  6. Select Update System Software
    In Safe Mode, choose Update System Software > Update from USB Storage Device, and follow the on-screen instructions.
  7. Install and Restart
    The PS5 will install the firmware from the USB and restart once complete.

Note: Do not turn off your PS5 or remove the USB drive during the update to avoid potential system damage.

Tips for a Smooth Firmware Update

  • Stable Power Supply: Ensure your PS5 is plugged into a reliable power source to avoid interruptions.
  • Check Storage Space: Updates may require free space on your console’s SSD.
  • Backup Data: Though rare, updates can cause issues. Back up your game saves and data to the cloud or a USB drive via Settings > Saved Data and Game/App Settings.
  • Stay Patient: Some updates may take longer depending on the file size and your internet speed.

Common Issues and Fixes

  • Update Fails to Download: Check your internet connection or try a wired Ethernet connection for stability.
  • Error Codes: If you encounter an error code, note it down and check Sony’s official support page for specific troubleshooting steps.
  • USB Update Not Recognized: Ensure the USB is formatted correctly and the file is in the proper folder structure (PS5/UPDATE/PS5UPDATE.PUP).

Why Keeping Firmware Updated Matters

Firmware updates are critical for maintaining your PS5’s performance and security. Outdated firmware can lead to compatibility issues with new games, slower performance, or even vulnerability to security risks. By following the steps above, you can ensure your PS5 is always ready for the latest gaming experiences.

FAQs

1. How do I know if my PS5 needs a firmware update?

Answer: Go to Settings > System > System Software > System Software Update and Settings to check for available updates.

2. Can I use my PS5 while it’s updating?

Answer: No, you cannot use your PS5 during a firmware update to avoid potential errors.

3. What happens if my PS5 firmware update is interrupted?

Answer: Interruptions may cause system issues. Restart in Safe Mode and retry the update.

4. How long does a PS5 firmware update take?

Answer: It typically takes 5–15 minutes, depending on the update size and internet speed.

5. Do I need an internet connection for a firmware update?

Answer: Yes, for automatic updates. For manual updates, you can use a USB drive without internet.

Conclusion

Updating your PS5 firmware is a simple process that keeps your console secure, stable, and ready for the latest games and features. Whether you choose automatic updates for convenience or manual updates for control, following these steps ensures a hassle-free experience. Stay proactive by enabling automatic updates and checking for new firmware regularly. Happy gaming!

How to Update Firmware of Xbox One

Keeping your Xbox One firmware up to date ensures optimal performance, access to new features, and enhanced security. This SEO-optimized guide will walk you through the process of updating your Xbox One firmware, whether online or offline, with clear steps and troubleshooting tips.

Why Update Your Xbox One Firmware?

Firmware updates for the Xbox One improve system stability, fix bugs, and introduce new functionalities like enhanced graphics or compatibility with new games. Regular updates also protect your console from security vulnerabilities, ensuring a seamless gaming experience.

Top Recommendation:
Discover the ultimate entertainment solution with 7 Days Great IPTV Subscription, designed just for you.

Method 1: Update Xbox One Firmware Online

The easiest way to update your Xbox One is through an internet connection. Follow these steps:

  1. Connect to the Internet: Ensure your Xbox One is connected to a stable Wi-Fi or Ethernet connection.
  2. Access Settings: Press the Xbox button on your controller to open the guide, then navigate to Profile & system > Settings > System > Updates & downloads.
  3. Check for Updates: Select “Update console” if an update is available. Your Xbox will download and install the latest firmware.
  4. Restart Console: Once the update is complete, your Xbox One will restart automatically.

Note: Ensure your console remains powered on and connected to the internet during the update to avoid interruptions.

Method 2: Update Xbox One Firmware Offline (USB Method)

If you lack a stable internet connection, you can update your Xbox One firmware using a USB drive. Here’s how:

  1. Prepare a USB Drive: Use a USB 3.0 drive with at least 4GB of free space, formatted to NTFS.
  2. Download the Update: Visit the official Xbox Support website on a computer, download the latest Offline System Update (OSU) file, and extract it to your USB drive.
  3. Insert USB into Xbox One: Turn off your Xbox One, plug the USB drive into a USB port on the console, and turn it back on.
  4. Start the Update: The Xbox One will detect the update file and begin the installation process. Follow on-screen prompts to complete the update.
  5. Remove USB and Restart: Once the update is finished, remove the USB drive and restart your console.

Troubleshooting Common Update Issues

  • Update Fails: Ensure a stable internet connection or re-download the OSU file for offline updates.
  • Console Freezes: Perform a hard reset by holding the power button for 10 seconds, then try the update again.
  • Error Codes: Visit the Xbox Support website and enter the error code for specific troubleshooting steps.

Tips for a Smooth Xbox One Firmware Update

  • Keep your console plugged into a power source to avoid interruptions.
  • Clear system cache before updating by navigating to Settings > System > Storage > Clear local saved games.
  • Check for updates regularly to stay current with the latest features.

Frequently Asked Questions (FAQs)

1. How long does an Xbox One firmware update take?

Answer: It typically takes 5-15 minutes, depending on your internet speed or USB method.

2. Can I use my Xbox One while it’s updating?

Answer: No, the console is unusable during the update process.

3. What happens if my Xbox One update is interrupted?

Answer: The console may restart and attempt the update again. Avoid interruptions to prevent issues.

4. Do I need an Xbox Live subscription to update my Xbox One?

Answer: No, firmware updates are free and don’t require Xbox Live.

5. How do I know if my Xbox One needs an update?

Answer: Check Settings > System > Updates & downloads to see if an update is available.

Conclusion

Updating your Xbox One firmware is a simple process that ensures your console performs at its best. Whether you choose the online or offline method, follow the steps above to keep your system up to date. For further assistance, visit the official Xbox Support website or contact their support team.

How to Setup IPTV on Xbox One via TiviMate Player

Unlock a world of live TV streaming with IPTV on your Xbox One! While TiviMate is a top-tier IPTV player for Android and Firestick, it’s not natively available on Xbox One. Don’t worry—this SEO-optimized guide explains alternative methods to set up IPTV on Xbox One using other reliable IPTV players like MyIPTV Player and Kodi. Follow these steps to enjoy seamless streaming of live TV channels, movies, and more in 2025.


Why Use IPTV on Xbox One?

IPTV (Internet Protocol Television) transforms your Xbox One into a powerful media hub, offering access to thousands of live TV channels, on-demand content, and sports at a fraction of traditional cable costs. With a user-friendly IPTV player, you can customize playlists, integrate Electronic Program Guides (EPG), and enjoy high-quality streaming. However, since TiviMate isn’t available in the Microsoft Store, we’ll explore the best alternatives to achieve a similar experience.


Prerequisites for Setting Up IPTV on Xbox One

Before diving in, ensure you have:

  • Xbox One console (or Xbox Series X/S) connected to the internet.
  • Active IPTV subscription with an M3U URL or Xtream Codes from a reputable provider.
  • EPG URL (optional, for TV guide integration).
  • NordVPN (recommended) to secure your connection and bypass geo-restrictions.

Note: Always use a VPN like NordVPN to protect your privacy and avoid potential legal issues when streaming IPTV content.


Method 1: Setting Up IPTV on Xbox One via MyIPTV Player

MyIPTV Player is a user-friendly IPTV app available on the Microsoft Store, making it an excellent TiviMate alternative for Xbox One. Here’s how to set it up:

Step 1: Install MyIPTV Player

  1. Turn on your Xbox One and navigate to the Microsoft Store from the home screen.
  2. Search for MyIPTV Player using the virtual keyboard.
  3. Select the app and click Get to download and install it.

Step 2: Add Your IPTV Playlist

  1. Launch MyIPTV Player from your Xbox dashboard.
  2. Go to the Settings menu.
  3. Select Add new playlist and EPG source.
  4. In the Remote Channel List section, enter a name for your playlist (e.g., “My IPTV”).
  5. Input the M3U URL provided by your IPTV provider.
  6. Click Add Remote List to save.

Step 3: Add EPG Source (Optional)

  1. In the Program Guide (EPG) section, enter the EPG URL from your provider.
  2. Click Add EPG Source.
  3. Return to Settings, select Select Playlist, and choose your added playlist.
  4. Select the EPG Source and enable relevant settings like Auto-update EPG.

Step 4: Stream IPTV Content

  1. Navigate to the Channels section in MyIPTV Player.
  2. Your IPTV channels will load. Select any channel to start streaming.
  3. Enjoy live TV, movies, or sports in high quality

Pro Tip: MyIPTV Player supports recording and PIN protection, offering a robust experience similar to TiviMate’s premium features.


Method 2: Setting Up IPTV on Xbox One via Kodi

Kodi is a versatile open-source media player available on Xbox One, perfect for IPTV streaming with the PVR IPTV Simple Client add-on. Here’s how to configure it:

Step 1: Install Kodi

  1. Open the Microsoft Store on your Xbox One.
  2. Search for Kodi and click Get to install it.

Step 2: Install PVR IPTV Simple Client

  1. Launch Kodi and go to Add-ons from the left menu.
  2. Click the Package Installer (open box icon) at the top.
  3. Select Install from repository > Kodi Add-on repository > PVR clients.
  4. Choose PVR IPTV Simple Client and click Install.

Step 3: Configure the Add-on

  1. After installation, select PVR IPTV Simple Client and click Configure.
  2. Under the General tab, select M3U Play List URL.
  3. Enter the M3U URL from your IPTV provider and click OK.
  4. Go to EPG Settings, enter the XMLTV URL (EPG URL), and click OK.
  5. Click Enable to activate the add-on.

Step 4: Access IPTV Channels

  1. Restart Kodi to apply changes.
  2. Navigate to the TV section from the home screen.
  3. Select Channels to view your IPTV channel list and start streaming.

Pro Tip: Kodi’s flexibility allows you to add multiple playlists and customize your viewing experience, mimicking TiviMate’s multi-playlist support.


Why TiviMate Isn’t Available on Xbox One

TiviMate is designed for Android TV devices and Firestick, with no official support for Xbox One due to platform restrictions. Its advanced features, like multi-view, catch-up, and recording, are exclusive to Android-based systems. However, MyIPTV Player and Kodi offer comparable functionality, with MyIPTV Player excelling in ease of use and Kodi providing extensive customization.


Tips for a Smooth IPTV Experience on Xbox One

  • Stable Internet Connection: Ensure a high-speed, stable connection to avoid buffering. A minimum of 10 Mbps is recommended for HD streaming.
  • Use a VPN: NordVPN encrypts your connection, protects your data, and unlocks geo-restricted content.
  • Verify IPTV Provider: Choose a reputable IPTV service with reliable M3U URLs and EPG support.
  • Update Apps: Keep MyIPTV Player or Kodi updated via the Microsoft Store for optimal performance.
  • Check Compatibility: Some IPTV providers may only offer login credentials instead of M3U URLs, which may not work with Xbox apps. Contact your provider for M3U support.

Benefits of Using IPTV on Xbox One

  • Cost-Effective: IPTV services are often cheaper than cable or satellite TV.
  • Global Content: Access channels from around the world, including sports, movies, and news.
  • Multi-Device Hub: Turn your Xbox One into an all-in-one entertainment system.
  • Customizable Playlists: Organize channels and integrate EPG for a personalized experience.

Troubleshooting Common IPTV Issues on Xbox One

  • Buffering: Check your internet speed or lower the stream quality in the app settings.
  • Playlist Not Loading: Verify the M3U URL is correct and active. Contact your IPTV provider if issues persist.
  • EPG Not Displaying: Ensure the EPG URL is valid and refresh the guide in the app settings.
  • App Crashes: Update the app or reinstall it from the Microsoft Store.

5 FAQs About Setting Up IPTV on Xbox One

1. Can I install TiviMate on Xbox One?

No, TiviMate is not available on Xbox One. Use alternatives like MyIPTV Player or Kodi.

2. Is IPTV legal on Xbox One?

IPTV is legal if you use licensed providers. Always use a VPN to protect your privacy.

3. What is an M3U URL?

An M3U URL is a link provided by your IPTV service to access channel playlists.

4. Why is my IPTV buffering on Xbox One?

Buffering is often due to a slow internet connection. Ensure at least 10 Mbps and use a wired connection if possible.

5. Can I record IPTV on Xbox One?

Yes, MyIPTV Player supports recording live TV, similar to TiviMate’s premium features.


Conclusion

While TiviMate isn’t available for Xbox One, setting up IPTV with MyIPTV Player or Kodi is straightforward and delivers a comparable streaming experience. By following this guide, you can transform your Xbox One into a powerful IPTV hub, enjoying live TV, movies, and sports with ease. Get started today by installing your preferred IPTV player, adding your playlist, and streaming securely with a VPN like NordVPN.

Ready to watch? Share this guide with fellow Xbox users and explore the endless possibilities of IPTV streaming in 2025!

Troubleshooting IPTV on XBOX: Common Issues & Fixes

IPTV (Internet Protocol Television) offers a convenient way to stream live TV and on-demand content on your Xbox console. However, users may encounter issues that disrupt their viewing experience. This article explores common IPTV problems on Xbox and provides practical solutions to ensure seamless streaming. Whether you’re facing buffering, app crashes, or connectivity issues, we’ve got you covered with expert tips to optimize your IPTV setup.

Why Use IPTV on Xbox?

Xbox consoles, including Xbox One and Xbox Series X/S, are versatile entertainment hubs that support various IPTV apps like Plex, Kodi, and TiviMate. These apps allow you to access live TV channels, movies, and shows through an internet connection. However, technical glitches can arise due to network issues, app configurations, or Xbox settings. Below, we address the most common IPTV issues and their fixes to enhance your streaming experience.

Top Recommendation:
Discover the ultimate entertainment solution with 7 Days Great IPTV Subscription, designed just for you.

Common IPTV Issues on Xbox and How to Fix Them

1. Buffering or Lag During Streaming

Issue: Constant buffering or lag makes it impossible to enjoy smooth playback.
Causes: Slow internet speeds, server overload, or improper app settings.

Fixes:

  • Check Internet Speed: Ensure your internet connection meets the minimum requirement for IPTV streaming (at least 10 Mbps for HD, 25 Mbps for 4K). Use a wired Ethernet connection instead of Wi-Fi for stability.
  • Reduce Network Load: Disconnect other devices using the same network to prioritize bandwidth for your Xbox.
  • Adjust App Settings: Lower the video quality in your IPTV app to reduce buffering on slower connections.
  • Restart Router and Xbox: Power cycle your router and console to refresh the connection.

2. IPTV App Crashes or Freezes

Issue: The IPTV app shuts down unexpectedly or becomes unresponsive.
Causes: Outdated app versions, corrupted cache, or compatibility issues.

Fixes:

  • Update the App: Check the Microsoft Store for updates to your IPTV app (e.g., Kodi or Plex) and install the latest version.
  • Clear App Cache: Go to Xbox Settings > Apps > Select the IPTV app > Clear cache or data.
  • Reinstall the App: Uninstall and reinstall the app to eliminate corrupted files.
  • Check Compatibility: Ensure the app is compatible with your Xbox model (e.g., some apps work better on Xbox Series X/S).

3. Unable to Connect to IPTV Service

Issue: The app fails to load channels or displays a “connection error” message.
Causes: Incorrect login credentials, server downtime, or firewall restrictions.

Fixes:

  • Verify Login Details: Double-check your IPTV provider’s username, password, and URL. Re-enter them in the app settings.
  • Test Server Status: Contact your IPTV provider to confirm if their servers are operational.
  • Disable Firewall/Antivirus: Temporarily disable any firewall or antivirus software on your router that might block IPTV connections.
  • Use a VPN: If your ISP restricts IPTV traffic, a reliable VPN can bypass throttling. Ensure the VPN is compatible with Xbox (configured via router or Smart DNS).

4. Poor Video or Audio Quality

Issue: Videos appear pixelated, or audio is out of sync.
Causes: Low-quality streams, outdated codecs, or incorrect Xbox display settings.

Fixes:

  • Select Higher Quality Streams: In the IPTV app, choose streams with higher bitrates if your internet supports it.
  • Update Codecs: For apps like Kodi, update the codec packs through the app’s settings or add-ons.
  • Adjust Xbox Display Settings: Go to Settings > Display & Sound > Video Output and ensure the resolution matches your TV (e.g., 1080p or 4K).
  • Check HDMI Connection: Use a high-quality HDMI cable to prevent signal degradation.

5. Channels or Playlists Not Loading

Issue: The IPTV app shows an empty playlist or fails to load channels.
Causes: Invalid M3U playlist, expired subscription, or app misconfiguration.

Fixes:

  • Validate M3U Playlist: Obtain a fresh M3U URL from your IPTV provider and re-enter it in the app.
  • Renew Subscription: Confirm your IPTV subscription is active and not expired.
  • Reset App Settings: Reset the app to default settings and reconfigure the playlist.
  • Switch Apps: If one app (e.g., TiviMate) fails, try an alternative like Plex or Kodi for better compatibility.

Tips to Optimize IPTV Performance on Xbox

  • Keep Xbox Updated: Regularly update your Xbox system software via Settings > System > Updates to ensure compatibility with IPTV apps.
  • Use a Reliable IPTV Provider: Choose a reputable provider with stable servers and 24/7 customer support.
  • Monitor Storage Space: Ensure your Xbox has enough free storage, as low space can cause app performance issues.
  • Test with Multiple Apps: Experiment with different IPTV apps to find the one that works best for your setup.
  • Enable Game Mode on TV: For smoother visuals, enable Game Mode on your TV to reduce input lag during streaming.

Troubleshooting Checklist for IPTV on Xbox

  1. Confirm internet speed and stability.
  2. Update the IPTV app and Xbox system software.
  3. Verify login credentials and playlist URLs.
  4. Clear app cache or reinstall the app.
  5. Contact your IPTV provider for server issues.
  6. Use a wired connection or VPN if needed.

By following these steps, you can resolve most IPTV issues on Xbox and enjoy uninterrupted streaming. If problems persist, reach out to your IPTV provider or Xbox support for further assistance.

Frequently Asked Questions (FAQs)

1. Why does my IPTV app keep buffering on Xbox?

Answer: Buffering is often due to slow internet or network congestion. Check your connection speed, use a wired connection, or lower the video quality.

2. Can I use a VPN for IPTV on Xbox?

Answer: Yes, configure a VPN on your router or use Smart DNS to bypass ISP restrictions and improve streaming.

3. How do I update my IPTV app on Xbox?

Answer: Go to the Microsoft Store, search for your IPTV app, and install any available updates.

4. Why are my IPTV channels not loading?

Answer: Check your M3U playlist URL, ensure your subscription is active, or try a different IPTV app.

5. Is IPTV legal to use on Xbox?

Answer: IPTV is legal if you use licensed providers. Avoid unverified services to stay compliant with copyright laws.

Conclusion

Streaming IPTV on Xbox can transform your console into a powerful media center, but technical issues can disrupt the experience. By addressing common problems like buffering, app crashes, and connectivity errors, you can optimize your setup for smooth performance. Follow the troubleshooting steps and tips outlined above to resolve issues quickly and enjoy seamless IPTV streaming on your Xbox. For persistent problems, consult your IPTV provider or Xbox support for tailored solutions.

How to Set Up IPTV on PS5 via Kodi App

Setting up IPTV on your PS5 using the Kodi app is a fantastic way to stream live TV channels, movies, and shows directly on your console. While the PS5 doesn’t natively support IPTV apps, Kodi serves as a versatile media player that can bridge this gap. In this SEO-optimized guide, we’ll walk you through the step-by-step process to set up IPTV on your PS5 via Kodi, ensuring a smooth streaming experience.

Why Use Kodi for IPTV on PS5?

Kodi is an open-source media player that supports a wide range of add-ons, including those for IPTV streaming. It’s highly customizable and compatible with various devices, making it an excellent choice for PS5 users looking to access IPTV services. With Kodi, you can organize your playlists, stream high-quality content, and enjoy a user-friendly interface.

Prerequisites for Setting Up IPTV on PS5

Before diving into the setup process, ensure you have the following:

  • A PS5 console with an active internet connection.
  • A reliable IPTV service subscription with an M3U playlist URL or file.
  • A USB drive or network access to transfer files to your PS5.
  • A computer or smartphone to configure Kodi settings.
  • Basic knowledge of Kodi add-ons and IPTV protocols.

Buy 1 Year IPTV Subscription and Enjoy Unlimited Content

Step-by-Step Guide to Set Up IPTV on PS5 via Kodi

Step 1: Install Kodi on Your PS5

Unfortunately, the PS5 does not natively support the Kodi app through its PlayStation Store. However, you can use a workaround by leveraging the PS5’s media player and a compatible device to stream Kodi content. Here’s how:

  • Install Kodi on a secondary device: Download and install Kodi on a PC, laptop, or Android device from the official Kodi website.
  • Enable DLNA/UPnP: Configure Kodi to share media via DLNA/UPnP, which allows your PS5 to access content from the device running Kodi.
  • Connect to the same network: Ensure your PS5 and the device running Kodi are on the same Wi-Fi network.

Step 2: Configure Kodi for IPTV

Once Kodi is set up on your secondary device, configure it to stream IPTV content:

  • Open Kodi and navigate to the Add-ons section.
  • Install the PVR IPTV Simple Client add-on from the Kodi repository:
    • Go to Add-ons > Install from repository > Kodi Add-on repository > PVR clients > PVR IPTV Simple Client.
    • Click Install and wait for the add-on to download.
  • Configure the PVR IPTV Simple Client:
    • Go to Add-ons > My add-ons > PVR clients > PVR IPTV Simple Client > Configure.
    • In the General tab, select M3U Play List URL and enter your IPTV provider’s M3U URL.
    • If you have a local M3U file, select M3U Play List Path and upload the file via a USB drive or network share.
    • Click OK to save the settings.
  • Enable the PVR client by navigating to Settings > PVR & Live TV > Enable.

Step 3: Stream IPTV Content to PS5

With Kodi configured, you can now stream IPTV content to your PS5:

  • Open the Media Player app on your PS5.
  • Navigate to the Network section and select the device running Kodi (it should appear as a DLNA server).
  • Browse the IPTV channels or playlists available through Kodi and select the content you want to stream.
  • Enjoy your IPTV channels on the PS5’s big screen!

Troubleshooting Common Issues

If you encounter issues during setup, try these fixes:

  • Channels not loading: Verify your M3U URL or file is correct and active. Contact your IPTV provider if the issue persists.
  • PS5 can’t find Kodi device: Ensure both devices are on the same network and DLNA/UPnP is enabled in Kodi settings.
  • Buffering or lag: Check your internet connection speed. A minimum of 10 Mbps is recommended for smooth IPTV streaming.

Tips for Optimizing Your IPTV Experience on PS5

  • Use a wired Ethernet connection for your PS5 to reduce buffering.
  • Regularly update Kodi and its add-ons to ensure compatibility and security.
  • Organize your IPTV playlists in Kodi for easier navigation.
  • Consider a premium IPTV service for higher-quality streams and reliable support.

FAQs

  1. Can I install Kodi directly on my PS5?
    No, PS5 doesn’t support Kodi natively. Use a secondary device with Kodi and stream via DLNA/UPnP.
  2. What is the PVR IPTV Simple Client?
    It’s a Kodi add-on that lets you stream IPTV channels using an M3U playlist.
  3. Why aren’t my IPTV channels loading?
    Check your M3U URL or file for accuracy and ensure your IPTV subscription is active.
  4. Do I need a fast internet connection for IPTV on PS5?
    Yes, a minimum of 10 Mbps is recommended for smooth streaming.
  5. Is it legal to use IPTV on PS5?
    It’s legal if your IPTV provider complies with copyright laws. Always use legitimate services.

Conclusion

Setting up IPTV on your PS5 via the Kodi app is a straightforward process once you understand the workaround. By using a secondary device to run Kodi and leveraging DLNA/UPnP, you can enjoy seamless IPTV streaming on your PS5. Follow this guide, troubleshoot any issues, and optimize your setup for the best viewing experience. Happy streaming!

How to Watch IPTV on Xbox in 2025

IPTV (Internet Protocol Television) is revolutionizing how we consume media, offering a flexible and cost-effective alternative to traditional cable TV. If you’re an Xbox user looking to stream IPTV content in 2025, you’re in luck! With the right setup, you can turn your Xbox into a powerful IPTV streaming hub. This SEO-optimized guide will walk you through the process of watching IPTV on Xbox, including setup tips, recommended apps, and troubleshooting advice to ensure a seamless experience.


Why Watch IPTV on Xbox?

The Xbox console, whether it’s the Xbox Series X, Series S, or Xbox One, is more than just a gaming device. Its robust hardware and access to a variety of streaming apps make it an ideal platform for IPTV. Here’s why you should consider using your Xbox for IPTV in 2025:

  • Large Screen Experience: Enjoy IPTV content on your big-screen TV with high-quality resolution.
  • Ease of Use: Navigate apps with your Xbox controller or voice commands.
  • Versatility: Access both live TV and on-demand content through a single device.
  • Cost-Effective: Eliminate the need for additional streaming devices.

Prerequisites for Watching IPTV on Xbox

Before diving into the setup process, ensure you have the following:

  1. A Compatible Xbox Console: Xbox One, Xbox Series X, or Series S.
  2. Stable Internet Connection: A minimum speed of 10 Mbps for HD streaming, or 25 Mbps for 4K.
  3. IPTV Subscription: A reliable IPTV service provider with an M3U playlist or URL.
  4. Microsoft Store Access: To download IPTV apps.
  5. Optional: An Xbox Game Pass or Xbox Live account for additional app compatibility.

Top Recommendation:
Discover the ultimate entertainment solution with 7 Days Great IPTV Subscription, designed just for you.


Step-by-Step Guide to Watch IPTV on Xbox in 2025

Follow these steps to set up and watch IPTV on your Xbox console:

Step 1: Choose a Reliable IPTV Provider

Selecting a reputable IPTV provider is crucial for a smooth streaming experience. Look for providers that offer:

  • A stable M3U playlist or Xtream Codes API.
  • High-quality streams (HD or 4K).
  • A wide range of channels, including sports, movies, and international content.
  • Responsive customer support.

Tip: Research user reviews and test the service with a trial period before committing.

Step 2: Download an IPTV App from the Microsoft Store

Xbox supports several IPTV apps available through the Microsoft Store. Popular options in 2025 include:

  • MyIPTV Player: A user-friendly app that supports M3U playlists and EPG (Electronic Program Guide).
  • IPTV Smarters: A feature-rich app with support for Xtream Codes and multi-device compatibility.
  • Kodi: A versatile media player that supports IPTV add-ons for advanced users.
  • TiviMate: Known for its sleek interface and robust playlist management (requires sideloading).

To download an app:

  1. Turn on your Xbox and sign in to your Microsoft account.
  2. Navigate to the Microsoft Store from the Xbox dashboard.
  3. Search for your preferred IPTV app (e.g., “MyIPTV Player”).
  4. Select Install and wait for the download to complete.

Step 3: Configure the IPTV App

Once the app is installed, configure it with your IPTV provider’s details:

  1. Open the IPTV app from your Xbox dashboard.
  2. Enter the M3U playlist URL or Xtream Codes provided by your IPTV service.
  3. If prompted, input your username, password, and server URL.
  4. Save the settings and wait for the app to load your channel list.

Note: Some apps, like Kodi, may require additional setup, such as installing IPTV add-ons (e.g., PVR IPTV Simple Client).

Step 4: Start Streaming IPTV

With the app configured, you’re ready to stream:

  1. Browse the channel list or EPG within the app.
  2. Select a channel or on-demand content to start watching.
  3. Use your Xbox controller to navigate, pause, or switch channels.

Recommended IPTV Apps for Xbox in 2025

Here’s a quick comparison of the top IPTV apps for Xbox:

AppKey FeaturesBest For
MyIPTV PlayerSimple interface, EPG supportBeginners
IPTV SmartersMulti-playlist support, Xtream CodesIntermediate users
KodiCustomizable with add-onsAdvanced users
TiviMateModern UI, advanced playlist managementPremium users (requires setup)

Tips for Optimizing Your IPTV Experience on Xbox

To ensure smooth streaming and avoid common issues, follow these tips:

  • Use a Wired Connection: Connect your Xbox to your router via Ethernet for a more stable internet connection.
  • Update Your Apps: Regularly check for app updates in the Microsoft Store to access the latest features and bug fixes.
  • Check Your IPTV Provider’s Status: Server downtime or maintenance can cause buffering or channel issues.
  • Adjust Video Settings: Set your Xbox display settings to match your TV’s resolution (e.g., 1080p or 4K) for optimal quality.
  • Use a VPN (Optional): A VPN can help bypass geo-restrictions or protect your privacy, but ensure it’s compatible with Xbox.

Troubleshooting Common IPTV Issues on Xbox

Encountering issues? Here are solutions to common problems:

  • Buffering or Lag:
    • Check your internet speed using Xbox’s network settings.
    • Lower the stream quality in the IPTV app settings.
    • Restart your router and Xbox.
  • App Crashes:
    • Clear the app’s cache or reinstall it from the Microsoft Store.
    • Ensure your Xbox firmware is up to date.
  • Channels Not Loading:
    • Verify your M3U playlist or Xtream Codes with your provider.
    • Test the playlist on another device to isolate the issue.
  • Geo-Restrictions:
    • Contact your IPTV provider for alternative server URLs.
    • Consider setting up a VPN on your router (Xbox doesn’t natively support VPN apps).

Is Watching IPTV on Xbox Legal?

Watching IPTV on Xbox is legal as long as you use a legitimate IPTV provider that holds proper licensing for the content they distribute. Avoid unverified IPTV services, as they may offer pirated content, which could lead to legal issues or security risks. Always research your provider and ensure they comply with copyright laws.


FAQs

  1. Can I watch IPTV on Xbox Series X or S?
    Yes, both support IPTV apps like MyIPTV Player and IPTV Smarters.
  2. Do I need an IPTV subscription for Xbox?
    Yes, a valid IPTV subscription with an M3U playlist or Xtream Codes is required.
  3. Which is the best IPTV app for Xbox?
    MyIPTV Player is great for beginners; IPTV Smarters offers more features.
  4. Why is my IPTV buffering on Xbox?
    Check your internet speed (10 Mbps minimum) or try a wired connection.
  5. Is using IPTV on Xbox legal?
    Yes, if you use a licensed IPTV provider; avoid unverified services.

Conclusion

Watching IPTV on Xbox in 2025 is a fantastic way to enjoy live TV, movies, and sports on a single, powerful device. By choosing a reliable IPTV provider, downloading a compatible app, and following our step-by-step guide, you can transform your Xbox into an entertainment powerhouse. Optimize your setup with our tips and troubleshoot any issues to enjoy a seamless streaming experience.

Ready to get started? Power up your Xbox, download an IPTV app, and dive into a world of endless entertainment!

How to Use VPN for IPTV on MAG Box

Using a VPN for IPTV on a MAG Box can enhance your streaming experience by improving security, bypassing geo-restrictions, and ensuring smoother connectivity. This guide explains how to set up and use a VPN with your MAG Box for optimal IPTV performance, while incorporating SEO-friendly practices to help you understand the process clearly.

Why Use a VPN for IPTV on MAG Box?

A Virtual Private Network (VPN) encrypts your internet connection, protecting your data and masking your IP address. When using IPTV on a MAG Box, a VPN offers several benefits:

  • Enhanced Privacy: Prevents your ISP or third parties from monitoring your streaming activities.
  • Bypass Geo-Restrictions: Access IPTV content restricted to specific regions.
  • Avoid ISP Throttling: ISPs may slow down your connection during heavy streaming; a VPN can help maintain consistent speeds.
  • Improved Security: Protects against potential cyber threats on public or unsecured networks.

By combining a VPN with your MAG Box, you ensure a seamless and secure IPTV experience.

Choosing the Right VPN for MAG Box

Not all VPNs are compatible with MAG Box devices, as these devices run on Linux-based systems and lack native VPN app support. Here’s what to look for when selecting a VPN:

  • Router Compatibility: Since MAG Box doesn’t support VPN apps directly, choose a VPN that works with routers (e.g., DD-WRT, Tomato, or ASUS routers).
  • Fast Speeds: Opt for a VPN with high-speed servers to minimize buffering during IPTV streaming.
  • Strong Encryption: Look for AES-256 encryption to ensure robust security.
  • Wide Server Network: A large server network allows access to content from various regions.
  • No-Logs Policy: Ensures your streaming activities remain private.
  • Reliable Support: 24/7 customer support can help troubleshoot setup issues.

Popular VPNs like NordVPN, ExpressVPN, and Surfshark are known for their router compatibility and IPTV-friendly features.

Top Recommendation:
Discover the ultimate entertainment solution with 7 Days Great IPTV Subscription, designed just for you.

Step-by-Step Guide to Using a VPN with IPTV on MAG Box

Since MAG Box devices don’t support VPN apps, you’ll need to set up the VPN on your router to cover all devices on your network, including the MAG Box. Follow these steps:

Step 1: Subscribe to a VPN Service

Sign up for a reputable VPN provider that supports router configurations. Download the VPN’s configuration files (e.g., OpenVPN) or check for router-specific setup guides.

Step 2: Configure the VPN on Your Router

  1. Access Your Router’s Admin Panel: Open a browser, enter your router’s IP address (e.g., 192.168.1.1), and log in.
  2. Check Router Compatibility: Ensure your router supports VPN protocols like OpenVPN or PPTP. If not, consider flashing it with firmware like DD-WRT or Tomato (consult your VPN provider’s guide).
  3. Set Up the VPN:
    • Navigate to the VPN section in your router’s settings.
    • Upload the VPN configuration file or manually enter the server details provided by your VPN.
    • Input your VPN username and password.
    • Save and apply the settings.
  4. Connect to a VPN Server: Choose a server location that aligns with your IPTV content needs (e.g., a U.S. server for U.S.-based IPTV channels).
  5. Restart Your Router: Reboot to ensure the VPN connection is active.

Step 3: Connect Your MAG Box to the VPN-Enabled Network

  1. Power on your MAG Box and connect it to the router via Ethernet or Wi-Fi.
  2. Ensure the MAG Box is using the VPN-enabled network (it will automatically route traffic through the VPN).
  3. Test the connection by accessing your IPTV service.

Step 4: Optimize Your IPTV Experience

  • Select the Right Server: Choose a VPN server close to your IPTV provider’s servers for faster speeds.
  • Enable Split Tunneling (if available): Some routers allow split tunneling to route only IPTV traffic through the VPN, reducing bandwidth strain.
  • Monitor Performance: If buffering occurs, try a different VPN server or contact your VPN’s support team.

Troubleshooting Common Issues

  • Slow Streaming Speeds: Switch to a less congested VPN server or check your internet connection.
  • Connection Drops: Ensure your router firmware is up to date and recheck VPN settings.
  • Geo-Restrictions Persist: Verify you’re connected to the correct server location or clear your MAG Box cache.
  • VPN Not Connecting: Double-check your VPN credentials and router configuration.

If issues persist, consult your VPN provider’s support team or check their knowledge base for MAG Box-specific advice.

Best Practices for Using VPN with IPTV on MAG Box

  • Regularly Update Firmware: Keep your router and MAG Box firmware updated for optimal performance.
  • Test Multiple Servers: Experiment with different VPN servers to find the fastest one for your IPTV service.
  • Use a Wired Connection: Connect your MAG Box via Ethernet for a more stable connection.
  • Monitor Data Usage: Some IPTV services consume significant bandwidth, so ensure your VPN plan supports unlimited data.

Is Using a VPN for IPTV on MAG Box Legal?

Using a VPN for IPTV is legal in most countries, provided you’re accessing legitimate, licensed content. However, using a VPN to access pirated or unauthorized IPTV streams may violate copyright laws. Always ensure you’re using legal IPTV services to stay compliant.

FAQs

  1. Can I install a VPN directly on my MAG Box?
    No, MAG Box doesn’t support VPN apps. Set up the VPN on your router instead.
  2. Will a VPN slow down my IPTV streaming?
    A high-quality VPN with fast servers should minimize speed loss. Choose a nearby server for best results.
  3. Which VPN is best for MAG Box IPTV?
    NordVPN, ExpressVPN, and Surfshark are great choices due to their router compatibility and fast speeds.
  4. Is it legal to use a VPN with IPTV on MAG Box?
    Yes, as long as you’re accessing legal IPTV content. Avoid using VPNs for pirated streams.
  5. How do I fix buffering issues with a VPN on MAG Box?
    Switch to a less congested VPN server, use a wired connection, or check your internet speed.

Conclusion

Setting up a VPN for IPTV on your MAG Box can significantly enhance your streaming experience by improving privacy, bypassing restrictions, and preventing throttling. By choosing a reliable VPN, configuring it on your router, and following best practices, you can enjoy seamless and secure IPTV streaming. Follow the steps outlined in this guide to get started and unlock the full potential of your MAG Box.

For the best results, test different VPN servers and monitor performance to ensure a buffer-free experience. Happy streaming!

How to Use VPN for IPTV on PS5 for a Better Experience

Using a VPN for IPTV on PS5 can significantly enhance your streaming experience by improving security, bypassing geo-restrictions, and ensuring smoother connections. This guide explains how to set up a VPN on your PS5 for IPTV, its benefits, and tips for optimizing performance. Follow these steps to unlock a seamless and secure IPTV experience on your PlayStation 5.

Why Use a VPN for IPTV on PS5?

A Virtual Private Network (VPN) encrypts your internet connection and routes it through a server in a location of your choice. Here’s why using a VPN for IPTV on your PS5 is a game-changer:

  • Bypass Geo-Restrictions: Access IPTV content locked to specific regions, such as exclusive shows or sports streams.
  • Enhanced Privacy: Protect your streaming activity from ISP tracking or potential hackers.
  • Avoid ISP Throttling: Prevent your internet provider from slowing down your connection during heavy streaming.
  • Improved Security: Safeguard your data on public or shared Wi-Fi networks.
  • Access More Content: Unlock a broader range of IPTV apps and services available in different countries.

By combining a VPN with IPTV on PS5, you can enjoy unrestricted access to global content with added security.

Can You Install a VPN Directly on PS5?

The PlayStation 5 does not support native VPN apps. However, you can still use a VPN by configuring it on your router, sharing a VPN connection from a PC or Mac, or using Smart DNS. The most reliable method is setting up a VPN on your router, as it covers all devices on your network, including your PS5.

Below, we’ll focus on the router method and provide alternative options for flexibility.

Top Recommendation:
Discover the ultimate entertainment solution with 7 Days Great IPTV Subscription, designed just for you.

Step-by-Step Guide: How to Set Up a VPN for IPTV on PS5

Method 1: Configure VPN on Your Router (Recommended)

Setting up a VPN on your router ensures your PS5 and other devices automatically connect through the VPN. Here’s how to do it:

  1. Choose a VPN Service:
    • Select a reputable VPN provider with fast servers, strong encryption, and support for router setup. Popular options include NordVPN, ExpressVPN, and Surfshark.
    • Ensure the VPN has servers in the regions where your desired IPTV content is available.
  2. Check Router Compatibility:
    • Verify that your router supports VPN configurations (most modern routers do). Common firmware like DD-WRT, Tomato, or ASUSWRT are VPN-friendly.
    • If your router isn’t compatible, consider purchasing a pre-configured VPN router or flashing your router with compatible firmware.
  3. Log In to Your Router:
    • Access your router’s admin panel by entering its IP address (e.g., 192.168.1.1) in a browser.
    • Log in using your router’s credentials (check the router manual if unsure).
  4. Configure the VPN:
    • Navigate to the VPN or OpenVPN section in your router’s settings.
    • Download the VPN configuration files from your VPN provider’s website.
    • Enter the server details, username, and password provided by your VPN service.
    • Save and apply the settings.
  5. Connect Your PS5:
    • Connect your PS5 to the router’s Wi-Fi network or via an Ethernet cable.
    • Test the connection by accessing an IPTV app (e.g., Plex, Kodi, or regional streaming services) to ensure it works and loads content from the desired region.
  6. Test the VPN:
    • Visit a geo-restricted IPTV service or website to confirm the VPN is working.
    • Check your IP address using a site like whatismyipaddress.com to verify it matches the VPN server’s location.

Method 2: Share VPN Connection from a PC or Mac

If you don’t want to configure your router, you can share a VPN connection from a computer:

  1. Set Up VPN on Your Computer:
    • Install a VPN app on your PC or Mac and connect to a server in the desired region.
  2. Enable Internet Sharing:
    • On Windows: Go to “Network and Sharing Center,” enable “Internet Connection Sharing,” and select your PS5’s Ethernet or Wi-Fi connection.
    • On Mac: Go to “System Preferences” > “Sharing,” enable “Internet Sharing,” and choose to share your VPN connection via Ethernet or Wi-Fi.
  3. Connect PS5 to the Shared Network:
    • Connect your PS5 to the computer via Ethernet or the shared Wi-Fi hotspot.
    • Test the IPTV app to ensure content loads correctly.

Method 3: Use Smart DNS (Alternative)

Some VPN providers offer Smart DNS, which allows you to bypass geo-restrictions without encrypting your connection. This method is faster but less secure than a VPN.

  1. Get Smart DNS Details:
    • Sign up for a VPN service that includes Smart DNS (e.g., ExpressVPN or Surfshark).
    • Find the Smart DNS server addresses in your VPN provider’s dashboard.
  2. Configure DNS on PS5:
    • On your PS5, go to Settings > Network > Set Up Internet Connection.
    • Select your Wi-Fi or LAN connection, choose “Manual” for DNS settings, and enter the Smart DNS addresses.
    • Save and test the connection.
  3. Access IPTV Apps:
    • Open your IPTV app and verify that geo-restricted content is accessible.

Tips for Optimizing VPN for IPTV on PS5

To ensure the best streaming experience, follow these tips:

  • Choose a Fast VPN Server: Select a server close to your location or the IPTV provider’s region for minimal speed loss.
  • Use Split Tunneling (If Available): Configure your router or VPN app to route only IPTV traffic through the VPN, leaving other activities unaffected.
  • Enable a Kill Switch: Ensure your VPN has a kill switch to prevent data leaks if the connection drops.
  • Test Different Protocols: Experiment with VPN protocols like OpenVPN, WireGuard, or IKEv2 for the best balance of speed and security.
  • Update Firmware: Keep your router and PS5 firmware updated to avoid compatibility issues.
  • Monitor Speed: Use a speed test tool to ensure your VPN connection supports HD or 4K streaming without buffering.

Best VPNs for IPTV on PS5

Here are some top VPNs for IPTV streaming on PS5, based on speed, server coverage, and router compatibility:

  1. NordVPN:
    • Features: 5,500+ servers, fast speeds, dedicated IPTV support, and easy router setup.
    • Best For: Streaming 4K content with minimal buffering.
  2. ExpressVPN:
    • Features: 3,000+ servers, user-friendly router setup, and Smart DNS for faster streaming.
    • Best For: Accessing global IPTV services with high reliability.
  3. Surfshark:
    • Features: Unlimited device connections, budget-friendly, and strong unblocking capabilities.
    • Best For: Households with multiple streaming devices.

Always check the VPN provider’s website for the latest setup guides and server availability.

Common Issues and Fixes

  • Slow Streaming: Switch to a closer VPN server, lower the encryption level, or upgrade your internet plan.
  • Connection Drops: Restart your router, reconnect the VPN, or try a different server.
  • Geo-Restrictions Persist: Clear your PS5’s cache, restart the IPTV app, or contact your VPN’s support team.
  • VPN Blocked by IPTV Service: Switch to a different VPN server or use Smart DNS as a workaround.

Is Using a VPN for IPTV on PS5 Legal?

Using a VPN is legal in most countries, including for IPTV streaming on PS5. However, accessing content that violates copyright laws or the terms of service of an IPTV provider may be illegal. Always use a VPN responsibly and ensure you’re complying with local laws and platform policies.

FAQs

  1. Can I install a VPN directly on my PS5?
    No, PS5 doesn’t support native VPN apps. Use a router or PC to set it up.
  2. Will a VPN slow down my IPTV streaming?
    A fast VPN like NordVPN minimizes speed loss for smooth streaming.
  3. Is using a VPN for IPTV on PS5 legal?
    Yes, but ensure you comply with IPTV service terms and local laws.
  4. Which VPN is best for PS5 IPTV?
    NordVPN, ExpressVPN, and Surfshark are top choices for speed and servers.
  5. Can I use Smart DNS instead of a VPN?
    Yes, Smart DNS bypasses geo-restrictions but offers less security.

Conclusion

Setting up a VPN for IPTV on PS5 unlocks a world of content while keeping your connection secure and private. By configuring a VPN on your router, sharing a connection from a computer, or using Smart DNS, you can bypass geo-restrictions, avoid ISP throttling, and enjoy buffer-free streaming. Choose a reliable VPN like NordVPN, ExpressVPN, or Surfshark, and follow our optimization tips for the best experience.

Ready to elevate your IPTV streaming on PS5? Set up your VPN today and enjoy unrestricted access to global entertainment!