Tag: IPTV

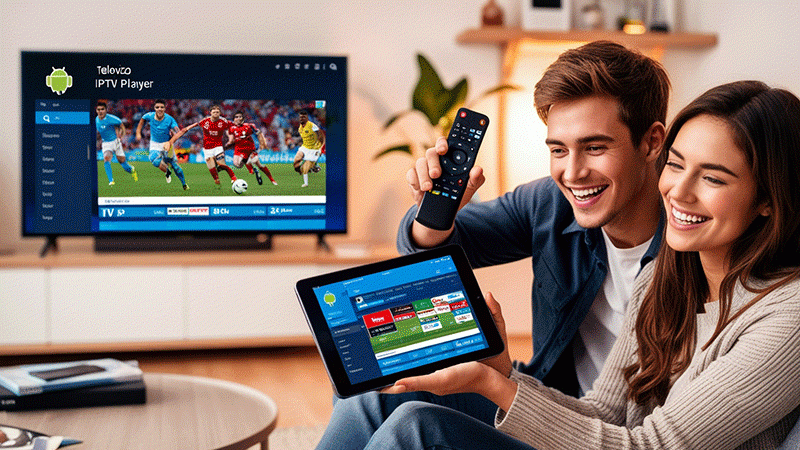
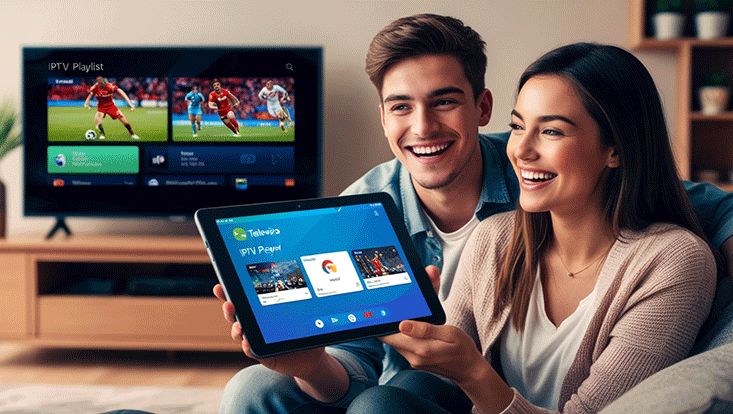
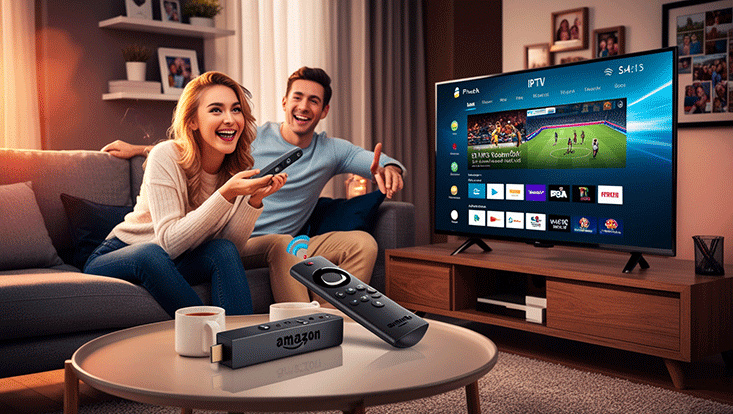
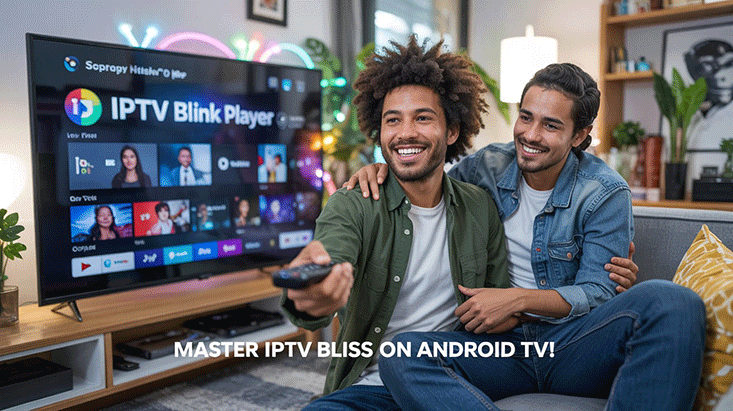
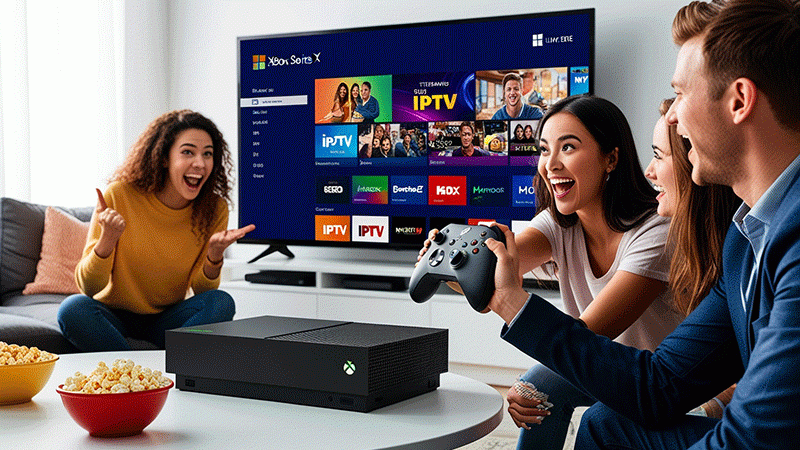
How to Watch IPTV on Xbox in 2025

IPTV (Internet Protocol Television) is revolutionizing how we consume media, offering a flexible and cost-effective alternative to traditional cable TV. If you’re an Xbox user looking to stream IPTV content in 2025, you’re in luck! With the right setup, you can turn your Xbox into a powerful IPTV streaming hub. This SEO-optimized guide will walk you through the process of watching IPTV on Xbox, including setup tips, recommended apps, and troubleshooting advice to ensure a seamless experience.


Why Watch IPTV on Xbox?

The Xbox console, whether it’s the Xbox Series X, Series S, or Xbox One, is more than just a gaming device. Its robust hardware and access to a variety of streaming apps make it an ideal platform for IPTV. Here’s why you should consider using your Xbox for IPTV in 2025:

  • Large Screen Experience: Enjoy IPTV content on your big-screen TV with high-quality resolution.
  • Ease of Use: Navigate apps with your Xbox controller or voice commands.
  • Versatility: Access both live TV and on-demand content through a single device.
  • Cost-Effective: Eliminate the need for additional streaming devices.

Prerequisites for Watching IPTV on Xbox

Before diving into the setup process, ensure you have the following:

  1. A Compatible Xbox Console: Xbox One, Xbox Series X, or Series S.
  2. Stable Internet Connection: A minimum speed of 10 Mbps for HD streaming, or 25 Mbps for 4K.
  3. IPTV Subscription: A reliable IPTV service provider with an M3U playlist or URL.
  4. Microsoft Store Access: To download IPTV apps.
  5. Optional: An Xbox Game Pass or Xbox Live account for additional app compatibility.
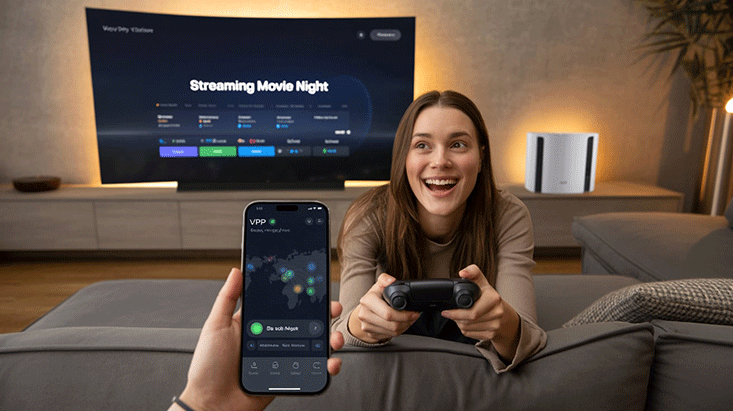
Top Recommendation:
Discover the ultimate entertainment solution with 7 Days Great IPTV Subscription, designed just for you.


Step-by-Step Guide to Watch IPTV on Xbox in 2025

Follow these steps to set up and watch IPTV on your Xbox console:

Step 1: Choose a Reliable IPTV Provider

Selecting a reputable IPTV provider is crucial for a smooth streaming experience. Look for providers that offer:

  • A stable M3U playlist or Xtream Codes API.
  • High-quality streams (HD or 4K).
  • A wide range of channels, including sports, movies, and international content.
  • Responsive customer support.

Tip: Research user reviews and test the service with a trial period before committing.

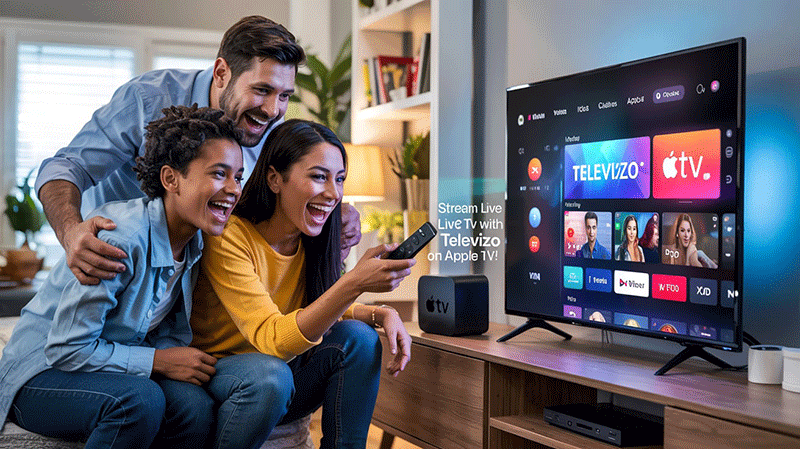
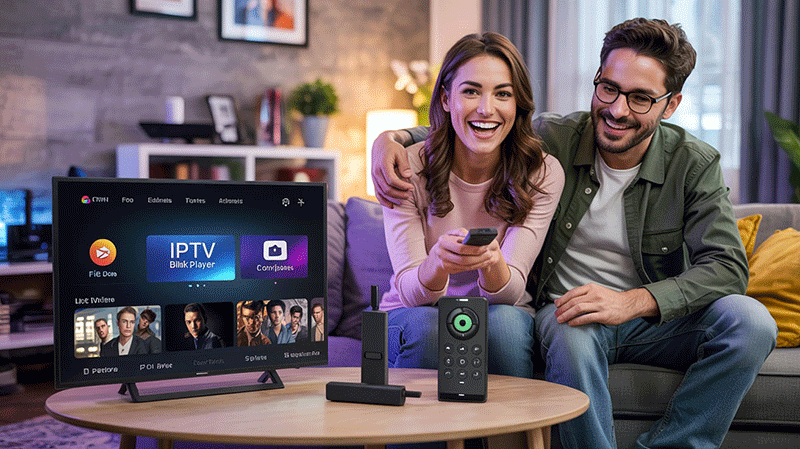
Step 2: Download an IPTV App from the Microsoft Store

Xbox supports several IPTV apps available through the Microsoft Store. Popular options in 2025 include:

  • MyIPTV Player: A user-friendly app that supports M3U playlists and EPG (Electronic Program Guide).
  • IPTV Smarters: A feature-rich app with support for Xtream Codes and multi-device compatibility.
  • Kodi: A versatile media player that supports IPTV add-ons for advanced users.
  • TiviMate: Known for its sleek interface and robust playlist management (requires sideloading).

To download an app:

  1. Turn on your Xbox and sign in to your Microsoft account.
  2. Navigate to the Microsoft Store from the Xbox dashboard.
  3. Search for your preferred IPTV app (e.g., “MyIPTV Player”).
  4. Select Install and wait for the download to complete.

Step 3: Configure the IPTV App

Once the app is installed, configure it with your IPTV provider’s details:

  1. Open the IPTV app from your Xbox dashboard.
  2. Enter the M3U playlist URL or Xtream Codes provided by your IPTV service.
  3. If prompted, input your username, password, and server URL.
  4. Save the settings and wait for the app to load your channel list.

Note: Some apps, like Kodi, may require additional setup, such as installing IPTV add-ons (e.g., PVR IPTV Simple Client).

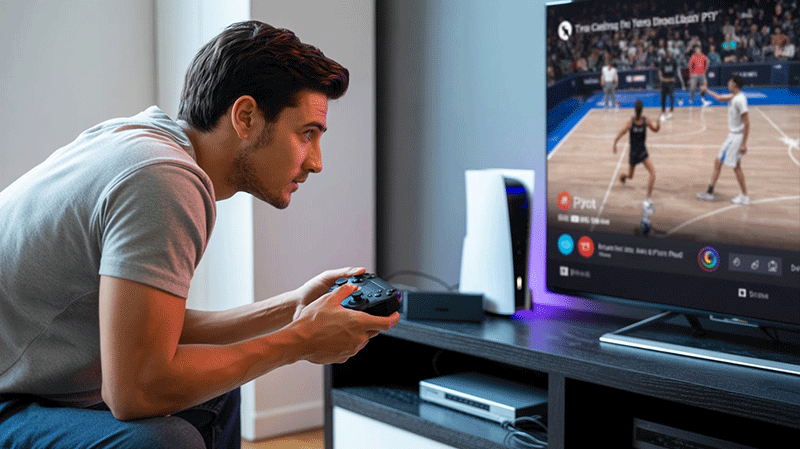
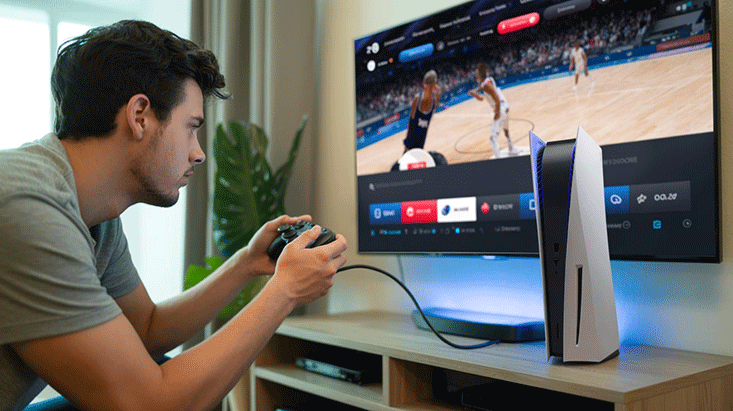
Step 4: Start Streaming IPTV

With the app configured, you’re ready to stream:

  1. Browse the channel list or EPG within the app.
  2. Select a channel or on-demand content to start watching.
  3. Use your Xbox controller to navigate, pause, or switch channels.

Recommended IPTV Apps for Xbox in 2025

Here’s a quick comparison of the top IPTV apps for Xbox:

AppKey FeaturesBest For
MyIPTV PlayerSimple interface, EPG supportBeginners
IPTV SmartersMulti-playlist support, Xtream CodesIntermediate users
KodiCustomizable with add-onsAdvanced users
TiviMateModern UI, advanced playlist managementPremium users (requires setup)

Tips for Optimizing Your IPTV Experience on Xbox

To ensure smooth streaming and avoid common issues, follow these tips:

  • Use a Wired Connection: Connect your Xbox to your router via Ethernet for a more stable internet connection.
  • Update Your Apps: Regularly check for app updates in the Microsoft Store to access the latest features and bug fixes.
  • Check Your IPTV Provider’s Status: Server downtime or maintenance can cause buffering or channel issues.
  • Adjust Video Settings: Set your Xbox display settings to match your TV’s resolution (e.g., 1080p or 4K) for optimal quality.
  • Use a VPN (Optional): A VPN can help bypass geo-restrictions or protect your privacy, but ensure it’s compatible with Xbox.

Troubleshooting Common IPTV Issues on Xbox

Encountering issues? Here are solutions to common problems:

  • Buffering or Lag:
    • Check your internet speed using Xbox’s network settings.
    • Lower the stream quality in the IPTV app settings.
    • Restart your router and Xbox.
  • App Crashes:
    • Clear the app’s cache or reinstall it from the Microsoft Store.
    • Ensure your Xbox firmware is up to date.
  • Channels Not Loading:
    • Verify your M3U playlist or Xtream Codes with your provider.
    • Test the playlist on another device to isolate the issue.
  • Geo-Restrictions:
    • Contact your IPTV provider for alternative server URLs.
    • Consider setting up a VPN on your router (Xbox doesn’t natively support VPN apps).

Is Watching IPTV on Xbox Legal?

Watching IPTV on Xbox is legal as long as you use a legitimate IPTV provider that holds proper licensing for the content they distribute. Avoid unverified IPTV services, as they may offer pirated content, which could lead to legal issues or security risks. Always research your provider and ensure they comply with copyright laws.


FAQs

  1. Can I watch IPTV on Xbox Series X or S?
    Yes, both support IPTV apps like MyIPTV Player and IPTV Smarters.
  2. Do I need an IPTV subscription for Xbox?
    Yes, a valid IPTV subscription with an M3U playlist or Xtream Codes is required.
  3. Which is the best IPTV app for Xbox?
    MyIPTV Player is great for beginners; IPTV Smarters offers more features.
  4. Why is my IPTV buffering on Xbox?
    Check your internet speed (10 Mbps minimum) or try a wired connection.
  5. Is using IPTV on Xbox legal?
    Yes, if you use a licensed IPTV provider; avoid unverified services.

Conclusion

Watching IPTV on Xbox in 2025 is a fantastic way to enjoy live TV, movies, and sports on a single, powerful device. By choosing a reliable IPTV provider, downloading a compatible app, and following our step-by-step guide, you can transform your Xbox into an entertainment powerhouse. Optimize your setup with our tips and troubleshoot any issues to enjoy a seamless streaming experience.

Ready to get started? Power up your Xbox, download an IPTV app, and dive into a world of endless entertainment!

How to Use VPN for IPTV on MAG Box

Using a VPN for IPTV on a MAG Box can enhance your streaming experience by improving security, bypassing geo-restrictions, and ensuring smoother connectivity. This guide explains how to set up and use a VPN with your MAG Box for optimal IPTV performance, while incorporating SEO-friendly practices to help you understand the process clearly.

Why Use a VPN for IPTV on MAG Box?

A Virtual Private Network (VPN) encrypts your internet connection, protecting your data and masking your IP address. When using IPTV on a MAG Box, a VPN offers several benefits:

  • Enhanced Privacy: Prevents your ISP or third parties from monitoring your streaming activities.
  • Bypass Geo-Restrictions: Access IPTV content restricted to specific regions.
  • Avoid ISP Throttling: ISPs may slow down your connection during heavy streaming; a VPN can help maintain consistent speeds.
  • Improved Security: Protects against potential cyber threats on public or unsecured networks.

By combining a VPN with your MAG Box, you ensure a seamless and secure IPTV experience.

Choosing the Right VPN for MAG Box

Not all VPNs are compatible with MAG Box devices, as these devices run on Linux-based systems and lack native VPN app support. Here’s what to look for when selecting a VPN:

  • Router Compatibility: Since MAG Box doesn’t support VPN apps directly, choose a VPN that works with routers (e.g., DD-WRT, Tomato, or ASUS routers).
  • Fast Speeds: Opt for a VPN with high-speed servers to minimize buffering during IPTV streaming.
  • Strong Encryption: Look for AES-256 encryption to ensure robust security.
  • Wide Server Network: A large server network allows access to content from various regions.
  • No-Logs Policy: Ensures your streaming activities remain private.
  • Reliable Support: 24/7 customer support can help troubleshoot setup issues.

Popular VPNs like NordVPN, ExpressVPN, and Surfshark are known for their router compatibility and IPTV-friendly features.

Top Recommendation:
Discover the ultimate entertainment solution with 7 Days Great IPTV Subscription, designed just for you.

Step-by-Step Guide to Using a VPN with IPTV on MAG Box

Since MAG Box devices don’t support VPN apps, you’ll need to set up the VPN on your router to cover all devices on your network, including the MAG Box. Follow these steps:

Step 1: Subscribe to a VPN Service

Sign up for a reputable VPN provider that supports router configurations. Download the VPN’s configuration files (e.g., OpenVPN) or check for router-specific setup guides.

Step 2: Configure the VPN on Your Router

  1. Access Your Router’s Admin Panel: Open a browser, enter your router’s IP address (e.g., 192.168.1.1), and log in.
  2. Check Router Compatibility: Ensure your router supports VPN protocols like OpenVPN or PPTP. If not, consider flashing it with firmware like DD-WRT or Tomato (consult your VPN provider’s guide).
  3. Set Up the VPN:
    • Navigate to the VPN section in your router’s settings.
    • Upload the VPN configuration file or manually enter the server details provided by your VPN.
    • Input your VPN username and password.
    • Save and apply the settings.
  4. Connect to a VPN Server: Choose a server location that aligns with your IPTV content needs (e.g., a U.S. server for U.S.-based IPTV channels).
  5. Restart Your Router: Reboot to ensure the VPN connection is active.

Step 3: Connect Your MAG Box to the VPN-Enabled Network

  1. Power on your MAG Box and connect it to the router via Ethernet or Wi-Fi.
  2. Ensure the MAG Box is using the VPN-enabled network (it will automatically route traffic through the VPN).
  3. Test the connection by accessing your IPTV service.

Step 4: Optimize Your IPTV Experience

  • Select the Right Server: Choose a VPN server close to your IPTV provider’s servers for faster speeds.
  • Enable Split Tunneling (if available): Some routers allow split tunneling to route only IPTV traffic through the VPN, reducing bandwidth strain.
  • Monitor Performance: If buffering occurs, try a different VPN server or contact your VPN’s support team.

Troubleshooting Common Issues

  • Slow Streaming Speeds: Switch to a less congested VPN server or check your internet connection.
  • Connection Drops: Ensure your router firmware is up to date and recheck VPN settings.
  • Geo-Restrictions Persist: Verify you’re connected to the correct server location or clear your MAG Box cache.
  • VPN Not Connecting: Double-check your VPN credentials and router configuration.

If issues persist, consult your VPN provider’s support team or check their knowledge base for MAG Box-specific advice.

Best Practices for Using VPN with IPTV on MAG Box

  • Regularly Update Firmware: Keep your router and MAG Box firmware updated for optimal performance.
  • Test Multiple Servers: Experiment with different VPN servers to find the fastest one for your IPTV service.
  • Use a Wired Connection: Connect your MAG Box via Ethernet for a more stable connection.
  • Monitor Data Usage: Some IPTV services consume significant bandwidth, so ensure your VPN plan supports unlimited data.

Is Using a VPN for IPTV on MAG Box Legal?

Using a VPN for IPTV is legal in most countries, provided you’re accessing legitimate, licensed content. However, using a VPN to access pirated or unauthorized IPTV streams may violate copyright laws. Always ensure you’re using legal IPTV services to stay compliant.

FAQs

  1. Can I install a VPN directly on my MAG Box?
    No, MAG Box doesn’t support VPN apps. Set up the VPN on your router instead.
  2. Will a VPN slow down my IPTV streaming?
    A high-quality VPN with fast servers should minimize speed loss. Choose a nearby server for best results.
  3. Which VPN is best for MAG Box IPTV?
    NordVPN, ExpressVPN, and Surfshark are great choices due to their router compatibility and fast speeds.
  4. Is it legal to use a VPN with IPTV on MAG Box?
    Yes, as long as you’re accessing legal IPTV content. Avoid using VPNs for pirated streams.
  5. How do I fix buffering issues with a VPN on MAG Box?
    Switch to a less congested VPN server, use a wired connection, or check your internet speed.

Conclusion

Setting up a VPN for IPTV on your MAG Box can significantly enhance your streaming experience by improving privacy, bypassing restrictions, and preventing throttling. By choosing a reliable VPN, configuring it on your router, and following best practices, you can enjoy seamless and secure IPTV streaming. Follow the steps outlined in this guide to get started and unlock the full potential of your MAG Box.

For the best results, test different VPN servers and monitor performance to ensure a buffer-free experience. Happy streaming!

How to Use VPN for IPTV on PS5 for a Better Experience

Using a VPN for IPTV on PS5 can significantly enhance your streaming experience by improving security, bypassing geo-restrictions, and ensuring smoother connections. This guide explains how to set up a VPN on your PS5 for IPTV, its benefits, and tips for optimizing performance. Follow these steps to unlock a seamless and secure IPTV experience on your PlayStation 5.

Why Use a VPN for IPTV on PS5?

A Virtual Private Network (VPN) encrypts your internet connection and routes it through a server in a location of your choice. Here’s why using a VPN for IPTV on your PS5 is a game-changer:

  • Bypass Geo-Restrictions: Access IPTV content locked to specific regions, such as exclusive shows or sports streams.
  • Enhanced Privacy: Protect your streaming activity from ISP tracking or potential hackers.
  • Avoid ISP Throttling: Prevent your internet provider from slowing down your connection during heavy streaming.
  • Improved Security: Safeguard your data on public or shared Wi-Fi networks.
  • Access More Content: Unlock a broader range of IPTV apps and services available in different countries.

By combining a VPN with IPTV on PS5, you can enjoy unrestricted access to global content with added security.

Can You Install a VPN Directly on PS5?

The PlayStation 5 does not support native VPN apps. However, you can still use a VPN by configuring it on your router, sharing a VPN connection from a PC or Mac, or using Smart DNS. The most reliable method is setting up a VPN on your router, as it covers all devices on your network, including your PS5.

Below, we’ll focus on the router method and provide alternative options for flexibility.

Top Recommendation:
Discover the ultimate entertainment solution with 7 Days Great IPTV Subscription, designed just for you.

Step-by-Step Guide: How to Set Up a VPN for IPTV on PS5

Method 1: Configure VPN on Your Router (Recommended)

Setting up a VPN on your router ensures your PS5 and other devices automatically connect through the VPN. Here’s how to do it:

  1. Choose a VPN Service:
    • Select a reputable VPN provider with fast servers, strong encryption, and support for router setup. Popular options include NordVPN, ExpressVPN, and Surfshark.
    • Ensure the VPN has servers in the regions where your desired IPTV content is available.
  2. Check Router Compatibility:
    • Verify that your router supports VPN configurations (most modern routers do). Common firmware like DD-WRT, Tomato, or ASUSWRT are VPN-friendly.
    • If your router isn’t compatible, consider purchasing a pre-configured VPN router or flashing your router with compatible firmware.
  3. Log In to Your Router:
    • Access your router’s admin panel by entering its IP address (e.g., 192.168.1.1) in a browser.
    • Log in using your router’s credentials (check the router manual if unsure).
  4. Configure the VPN:
    • Navigate to the VPN or OpenVPN section in your router’s settings.
    • Download the VPN configuration files from your VPN provider’s website.
    • Enter the server details, username, and password provided by your VPN service.
    • Save and apply the settings.
  5. Connect Your PS5:
    • Connect your PS5 to the router’s Wi-Fi network or via an Ethernet cable.
    • Test the connection by accessing an IPTV app (e.g., Plex, Kodi, or regional streaming services) to ensure it works and loads content from the desired region.
  6. Test the VPN:
    • Visit a geo-restricted IPTV service or website to confirm the VPN is working.
    • Check your IP address using a site like whatismyipaddress.com to verify it matches the VPN server’s location.

Method 2: Share VPN Connection from a PC or Mac

If you don’t want to configure your router, you can share a VPN connection from a computer:

  1. Set Up VPN on Your Computer:
    • Install a VPN app on your PC or Mac and connect to a server in the desired region.
  2. Enable Internet Sharing:
    • On Windows: Go to “Network and Sharing Center,” enable “Internet Connection Sharing,” and select your PS5’s Ethernet or Wi-Fi connection.
    • On Mac: Go to “System Preferences” > “Sharing,” enable “Internet Sharing,” and choose to share your VPN connection via Ethernet or Wi-Fi.
  3. Connect PS5 to the Shared Network:
    • Connect your PS5 to the computer via Ethernet or the shared Wi-Fi hotspot.
    • Test the IPTV app to ensure content loads correctly.

Method 3: Use Smart DNS (Alternative)

Some VPN providers offer Smart DNS, which allows you to bypass geo-restrictions without encrypting your connection. This method is faster but less secure than a VPN.

  1. Get Smart DNS Details:
    • Sign up for a VPN service that includes Smart DNS (e.g., ExpressVPN or Surfshark).
    • Find the Smart DNS server addresses in your VPN provider’s dashboard.
  2. Configure DNS on PS5:
    • On your PS5, go to Settings > Network > Set Up Internet Connection.
    • Select your Wi-Fi or LAN connection, choose “Manual” for DNS settings, and enter the Smart DNS addresses.
    • Save and test the connection.
  3. Access IPTV Apps:
    • Open your IPTV app and verify that geo-restricted content is accessible.

Tips for Optimizing VPN for IPTV on PS5

To ensure the best streaming experience, follow these tips:

  • Choose a Fast VPN Server: Select a server close to your location or the IPTV provider’s region for minimal speed loss.
  • Use Split Tunneling (If Available): Configure your router or VPN app to route only IPTV traffic through the VPN, leaving other activities unaffected.
  • Enable a Kill Switch: Ensure your VPN has a kill switch to prevent data leaks if the connection drops.
  • Test Different Protocols: Experiment with VPN protocols like OpenVPN, WireGuard, or IKEv2 for the best balance of speed and security.
  • Update Firmware: Keep your router and PS5 firmware updated to avoid compatibility issues.
  • Monitor Speed: Use a speed test tool to ensure your VPN connection supports HD or 4K streaming without buffering.

Best VPNs for IPTV on PS5

Here are some top VPNs for IPTV streaming on PS5, based on speed, server coverage, and router compatibility:

  1. NordVPN:
    • Features: 5,500+ servers, fast speeds, dedicated IPTV support, and easy router setup.
    • Best For: Streaming 4K content with minimal buffering.
  2. ExpressVPN:
    • Features: 3,000+ servers, user-friendly router setup, and Smart DNS for faster streaming.
    • Best For: Accessing global IPTV services with high reliability.
  3. Surfshark:
    • Features: Unlimited device connections, budget-friendly, and strong unblocking capabilities.
    • Best For: Households with multiple streaming devices.

Always check the VPN provider’s website for the latest setup guides and server availability.

Common Issues and Fixes

  • Slow Streaming: Switch to a closer VPN server, lower the encryption level, or upgrade your internet plan.
  • Connection Drops: Restart your router, reconnect the VPN, or try a different server.
  • Geo-Restrictions Persist: Clear your PS5’s cache, restart the IPTV app, or contact your VPN’s support team.
  • VPN Blocked by IPTV Service: Switch to a different VPN server or use Smart DNS as a workaround.

Is Using a VPN for IPTV on PS5 Legal?

Using a VPN is legal in most countries, including for IPTV streaming on PS5. However, accessing content that violates copyright laws or the terms of service of an IPTV provider may be illegal. Always use a VPN responsibly and ensure you’re complying with local laws and platform policies.

FAQs

  1. Can I install a VPN directly on my PS5?
    No, PS5 doesn’t support native VPN apps. Use a router or PC to set it up.
  2. Will a VPN slow down my IPTV streaming?
    A fast VPN like NordVPN minimizes speed loss for smooth streaming.
  3. Is using a VPN for IPTV on PS5 legal?
    Yes, but ensure you comply with IPTV service terms and local laws.
  4. Which VPN is best for PS5 IPTV?
    NordVPN, ExpressVPN, and Surfshark are top choices for speed and servers.
  5. Can I use Smart DNS instead of a VPN?
    Yes, Smart DNS bypasses geo-restrictions but offers less security.

Conclusion

Setting up a VPN for IPTV on PS5 unlocks a world of content while keeping your connection secure and private. By configuring a VPN on your router, sharing a connection from a computer, or using Smart DNS, you can bypass geo-restrictions, avoid ISP throttling, and enjoy buffer-free streaming. Choose a reliable VPN like NordVPN, ExpressVPN, or Surfshark, and follow our optimization tips for the best experience.

Ready to elevate your IPTV streaming on PS5? Set up your VPN today and enjoy unrestricted access to global entertainment!

Troubleshooting IPTV on PS5: Common Issues & Fixes

IPTV (Internet Protocol Television) is a popular way to stream live TV, movies, and on-demand content on your PlayStation 5 (PS5). However, users often encounter issues like buffering, app crashes, or connectivity problems. This SEO-optimized guide covers common IPTV issues on PS5 and provides step-by-step fixes to ensure a seamless streaming experience.


Why IPTV Issues Occur on PS5

IPTV performance on PS5 can be affected by several factors, including:

  • Internet Connection: Slow or unstable Wi-Fi/Ethernet connections.
  • App Compatibility: IPTV apps not fully optimized for PS5.
  • Server Issues: Problems with the IPTV service provider.
  • Console Settings: Incorrect network or media settings.

Understanding these factors helps identify and resolve issues quickly. Below, we dive into the most common problems and their solutions.

Buy 1 Year IPTV Subscription and Enjoy Unlimited Content


Common IPTV Issues on PS5 and How to Fix Them

1. Buffering or Lagging Streams

Buffering is one of the most frequent complaints when using IPTV on PS5.

Causes:

  • Slow internet speed.
  • Network congestion.
  • IPTV server overload.

Fixes:

  1. Test Your Internet Speed:
    • Use the PS5’s built-in network test (Settings > Network > Connection Status > Test Internet Connection).
    • Ensure download speeds are at least 15-20 Mbps for HD streaming or 25+ Mbps for 4K.
  2. Switch to Ethernet:
    • Connect your PS5 to the router using an Ethernet cable for a more stable connection.
  3. Reduce Network Congestion:
    • Disconnect other devices from your Wi-Fi network to free up bandwidth.
  4. Contact Your IPTV Provider:
    • If buffering persists, the issue may be with the provider’s servers. Reach out for support.

Pro Tip: Restart your router and PS5 to refresh the connection.


2. IPTV App Crashes or Freezes

Apps like IPTV Smarters, TiviMate, or others may crash or become unresponsive.

Causes:

  • Outdated app version.
  • Insufficient console memory.
  • App compatibility issues with PS5.

Fixes:

  1. Update the App:
    • Check the PlayStation Store for app updates and install the latest version.
  2. Clear Cache:
    • Go to Settings > Storage > Apps, select the IPTV app, and clear its cache.
  3. Reinstall the App:
    • Delete the app (Settings > Storage > Apps > Delete) and reinstall it from the PlayStation Store.
  4. Check Compatibility:
    • Ensure the IPTV app is compatible with PS5. Visit the app’s official website or contact support for confirmation.

3. No Sound or Video

Some users report missing audio or video when streaming IPTV on PS5.

Causes:

  • Incorrect HDMI settings.
  • App-specific bugs.
  • TV compatibility issues.

Fixes:

  1. Check HDMI Connection:
    • Ensure your HDMI cable is securely connected and supports 4K HDR if applicable.
  2. Adjust Audio/Video Settings:
    • Go to Settings > Sound > Audio Output and ensure the correct output device is selected.
    • In Settings > Screen and Video > Video Output, verify resolution and HDR settings match your TV’s capabilities.
  3. Test with Another App:
    • Try streaming from another app (e.g., YouTube or Netflix) to rule out console-wide issues.
  4. Contact IPTV Support:
    • If the issue is specific to the IPTV app, report it to the provider for further assistance.

4. IPTV App Not Loading or Login Issues

Some users face problems logging in or loading the IPTV app.

Causes:

  • Incorrect login credentials.
  • Server downtime.
  • App configuration errors.

Fixes:

  1. Verify Credentials:
    • Double-check your username, password, and M3U URL (if applicable).
  2. Check Server Status:
    • Visit the IPTV provider’s website or social media for announcements about server maintenance or outages.
  3. Reset App Settings:
    • Log out of the app, clear its cache, and log in again.
  4. Contact Support:
    • If login issues persist, reach out to your IPTV provider for account verification.

5. Geo-Restrictions or Content Not Available

Certain IPTV channels or content may be unavailable due to regional restrictions.

Causes:

  • Content blocked by geographic location.
  • VPN misconfiguration.

Fixes:

  1. Use a VPN:
    • Install a reliable VPN app compatible with PS5 (e.g., via router setup or media streaming devices).
    • Connect to a server in a region where the content is available.
  2. Check IPTV Provider:
    • Confirm with your provider if the content is available in your region.
  3. Clear DNS Cache:
    • Reset your router to clear any DNS conflicts affecting geo-restricted content.

Note: Always use legal and reputable IPTV services to avoid issues with restricted content.


Best Practices for a Smooth IPTV Experience on PS5

To prevent future issues and optimize your IPTV streaming, follow these tips:

  • Maintain a Stable Internet Connection:
    • Use a wired Ethernet connection and ensure speeds meet streaming requirements.
  • Keep Apps and Console Updated:
    • Regularly check for PS5 system updates (Settings > System > System Software) and app updates.
  • Choose a Reliable IPTV Provider:
    • Research providers with strong server uptime and customer support.
  • Monitor Console Performance:
    • Avoid running multiple apps in the background to free up memory for IPTV streaming.
  • Use High-Quality Hardware:
    • Invest in a modern router and high-speed HDMI cables for optimal performance.

FAQs

Can I use any IPTV app on PS5?

Not all IPTV apps are compatible with PS5. Check the PlayStation Store or the app’s official website for compatibility details.

Why is my IPTV stream pixelated?

Pixelation is often caused by low internet speeds or server issues. Test your connection and contact your provider if the problem persists.

Is a VPN necessary for IPTV on PS5?

A VPN is only needed if you’re accessing geo-restricted content or want to enhance privacy. Ensure the VPN is set up correctly to avoid connectivity issues.

How do I install an IPTV app on PS5?

Download IPTV apps from the PlayStation Store. Search for apps like IPTV Smarters or check with your provider for recommended apps.


Conclusion

Troubleshooting IPTV issues on your PS5 doesn’t have to be daunting. By addressing common problems like buffering, app crashes, or login errors, you can enjoy seamless streaming. Follow the fixes outlined above, maintain a stable internet connection, and choose a reliable IPTV provider for the best experience. If issues persist, don’t hesitate to contact your IPTV provider or Sony support for further assistance.

For more gaming and streaming tips, stay tuned to our blog!

How to Setup Televizo IPTV Player on Apple TV in 2025

Looking to stream your favorite live TV channels and on-demand content on your Apple TV? The Televizo IPTV Player is a powerful and user-friendly app that lets you access IPTV services with ease. In this SEO-optimized guide, we’ll walk you through how to set up the Televizo IPTV Player app on Apple TV in 2025, covering installation, configuration, and tips for a seamless streaming experience.


What is Televizo IPTV Player?

Televizo IPTV Player is a versatile app designed to stream live TV, video-on-demand (VOD), and archived content from your IPTV provider. It supports M3U playlists and Xtream Codes API, offering a clean interface, parental controls, and electronic program guide (EPG) support. While Televizo is widely available on Android, Firestick, and Smart TVs, setting it up on Apple TV requires a few specific steps, as the app is not natively available in the Apple App Store at this time.

Key Features of Televizo IPTV Player:

  • Supports M3U and Xtream Codes playlists
  • EPG support for live TV schedules
  • Parental controls for safe viewing
  • High-quality streaming (SD, HD, 4K)
  • User-friendly and customizable interface

Prerequisites for Setting Up Televizo on Apple TV

Before you begin, ensure you have the following:

  1. Apple TV (4th generation or later) running tvOS 13.0 or higher.
  2. A valid IPTV subscription with M3U URL or Xtream Codes credentials from your provider.
  3. A stable internet connection (recommended: 10 Mbps or higher for HD streaming).
  4. A computer or USB drive to sideload the app (if required).
  5. Optional: A VPN to protect your privacy and access geo-restricted content. Popular choices include NordVPN or ExpressVPN.

Note: Televizo does not provide IPTV content; you must have a subscription from a reliable IPTV provider. Always ensure your provider is licensed to avoid legal issues.

Top Recommendation:
Discover the ultimate entertainment solution with 7 Days Great IPTV Subscription, designed just for you.


Step-by-Step Guide to Set Up Televizo IPTV Player on Apple TV

Since Televizo is not currently available on the Apple App Store for Apple TV, you’ll need to use an alternative IPTV app or sideload the app using a workaround. Below, we outline two methods: using a compatible IPTV app from the App Store and sideloading Televizo.

Method 1: Install an Alternative IPTV App from the Apple App Store

As of 2025, Televizo does not have a dedicated Apple TV app, but you can use other IPTV apps like GSE Smart IPTV or Smarters Player Lite, which are available on the Apple App Store and offer similar functionality. Here’s how to set it up:

  1. Open the Apple App Store:
    • From your Apple TV home screen, navigate to the App Store.
  2. Search for an IPTV App:
    • Use the search bar to find GSE Smart IPTV, Smarters Player Lite, or another trusted IPTV player.
    • Select the app and click Get to download and install it.
  3. Launch the IPTV App:
    • Once installed, open the app from your Apple TV home screen.
  4. Add Your IPTV Playlist:
    • In the app, select the option to add a playlist (e.g., Add M3U URL or Xtream Codes Login).
    • Enter the M3U URL or Xtream Codes credentials (username, password, and server URL) provided by your IPTV service.
    • Save the settings and wait for the playlist to load.
  5. Start Streaming:
    • Browse through the loaded channels, VOD, or EPG, and start watching your favorite content.

Recommended Apps for Apple TV:

  • GSE Smart IPTV: Supports M3U, JSON, and Xtream Codes with Chromecast and AirPlay support.
  • Smarters Player Lite: Offers a premium experience with parental controls and EPG management.

Method 2: Sideload Televizo IPTV Player on Apple TV (Advanced)

If you specifically want to use Televizo, you can sideload it onto your Apple TV using a developer tool like Xcode on a Mac. This method is more technical and requires a computer. Here’s how to do it:

  1. Prepare Your Mac:
    • Ensure you have a Mac with Xcode installed (available for free from the Mac App Store).
    • Download the Televizo IPA file from a trusted source or the official Televizo website (if available).
  2. Connect Apple TV to Your Mac:
    • Connect your Apple TV to the same Wi-Fi network as your Mac.
    • In Xcode, pair your Apple TV by navigating to Window > Devices and Simulators and selecting your Apple TV.
  3. Sign the IPA File:
    • Use a tool like iOS App Signer to sign the Televizo IPA file with your Apple ID.
    • In iOS App Signer, select the IPA file, choose your Apple ID, and generate a signed IPA.
  4. Install Televizo on Apple TV:
    • In Xcode, go to Window > Devices and Simulators, select your Apple TV, and click the + button to add the signed IPA file.
    • Wait for the installation to complete.
  5. Configure Televizo:
    • Launch the Televizo app on your Apple TV.
    • Select Create Playlist and choose New M3U Playlist or New Xtream Codes Playlist.
    • Enter your IPTV provider’s credentials (M3U URL or Xtream Codes details).
    • Tap the checkmark to load the playlist.
  6. Start Streaming:
    • Once the playlist loads, you can access live channels, VOD, and EPG content.

Note: Sideloading requires a free Apple Developer account, and the app may need to be re-signed every seven days unless you have a paid developer account. Always download IPA files from trusted sources to avoid security risks.


Tips for Optimizing Your Televizo IPTV Experience on Apple TV

  1. Use a VPN for Privacy:
    • Streaming IPTV content may expose your IP address. Use a VPN like NordVPN to encrypt your connection and bypass geo-restrictions.
  2. Check Your Internet Speed:
    • For smooth HD or 4K streaming, ensure your internet speed is at least 10–25 Mbps. Test your connection using a speed test app.
  3. Update Your Playlist Regularly:
    • Some IPTV providers update their M3U URLs or Xtream Codes. Contact your provider to ensure you have the latest credentials.
  4. Enable Parental Controls:
    • If you have kids, use Televizo’s parental control feature to restrict access to age-inappropriate content.
  5. Explore EPG Features:
    • Televizo supports XML EPG formats, allowing you to view TV schedules and set reminders for your favorite shows.

Troubleshooting Common Issues

  • App Not Loading Playlist:
    • Double-check your M3U URL or Xtream Codes credentials for typos.
    • Ensure your IPTV subscription is active and contact your provider if issues persist.
  • Buffering or Lag:
    • Lower the stream quality in the app settings or upgrade your internet plan.
    • Close background apps on your Apple TV to free up resources.
  • Sideloaded App Crashing:
    • Re-sign the IPA file using Xcode and reinstall the app.
    • Check for compatibility issues with your tvOS version.

For additional support, contact Televizo’s customer service via email at [email protected] or visit their Patreon/Boosty communities.


Is Televizo IPTV Player Safe and Legal?

Televizo IPTV Player is a legal app that acts as a media player for IPTV content. However, the legality of the content you stream depends on your IPTV provider. Streaming copyrighted content without a license is illegal in many countries, so always use a licensed provider and consider a VPN for added security.

The app itself is safe to use, but when sideloading, download the IPA file from reputable sources to avoid malware.


Conclusion

Setting up the Televizo IPTV Player on Apple TV in 2025 is achievable using an alternative IPTV app from the App Store or by sideloading the app with Xcode. By following the steps above, you can enjoy high-quality live TV, VOD, and EPG features on your Apple TV. For the best experience, use a reliable IPTV provider, a fast internet connection, and a VPN for privacy.

Frequently Asked Questions

  1. Is Televizo IPTV Player available on the Apple TV App Store?
    No, Televizo is not available on the Apple TV App Store. You can use alternative apps like GSE Smart IPTV or sideload Televizo.
  2. What do I need to use Televizo on Apple TV?
    An Apple TV (4th gen or later), an IPTV subscription with M3U/Xtream Codes, and a stable internet connection.
  3. Can I sideload Televizo on Apple TV without a Mac?
    No, sideloading requires a Mac with Xcode to install the Televizo IPA file.
  4. Why is my IPTV playlist not loading in Televizo?
    Check for typos in your M3U URL or Xtream Codes, ensure your subscription is active, or contact your provider.
  5. Is using Televizo on Apple TV legal?
    Televizo is legal, but streaming copyrighted content without a license is not. Use a licensed IPTV provider.

Ready to transform your Apple TV into an IPTV powerhouse? Install Televizo or a similar app today and start streaming your favorite channels! If you found this guide helpful, share it with friends or leave a comment below.

How to Install HotPlayer on Apple TV

Looking to elevate your streaming experience on Apple TV? The HotPlayer app is a versatile media player that supports M3U and M3U8 playlist links, allowing you to stream live TV, on-demand videos, and more. In this SEO-optimized guide, we’ll walk you through how to install the HotPlayer app on Apple TV, set it up, and start enjoying your favorite IPTV content. Whether you’re a beginner or a tech-savvy user, this article covers everything you need to know.


What Is the HotPlayer App?

HotPlayer is a powerful IPTV media player designed to stream content via M3U playlists and Xtream Codes API. It’s compatible with a wide range of devices, including iOS, Android, Samsung Smart TVs, LG TVs, Roku, and now Apple TV. With its user-friendly interface, HotPlayer makes it easy to navigate channels, create favorite lists, and enjoy high-quality playback. The app supports HD and 4K streaming, offers parental controls, and even includes an Electronic Program Guide (EPG) for live TV.

Note: HotPlayer is a media player and does not provide content or channels. You’ll need a valid M3U playlist or Xtream Codes from an IPTV provider to use the app. Always ensure your IPTV service is legal to avoid potential issues.


Why Choose HotPlayer for Apple TV?

Before diving into the installation process, here’s why HotPlayer is a great choice for Apple TV users:

  • Seamless Streaming: Supports M3U and M3U8 playlists for live TV and VOD.
  • Intuitive Interface: Easy navigation with a remote-friendly design.
  • Multi-Playlist Support: Upload up to three playlists and switch between them.
  • High-Quality Playback: Enjoy HD and 4K content with minimal buffering.
  • Privacy and Security: HotPlayer prioritizes user data protection and doesn’t share personal information.

Top Recommendation:
Discover the ultimate entertainment solution with 7 Days Great IPTV Subscription, designed just for you.


Prerequisites for Installing HotPlayer on Apple TV

To ensure a smooth installation, make sure you have the following:

  1. Apple TV (4th generation or later): Only these models support the App Store for downloading apps.
  2. Stable Internet Connection: A reliable Wi-Fi or Ethernet connection is essential for downloading and streaming.
  3. Apple ID: Required to access the App Store.
  4. Valid M3U Playlist or Xtream Codes: Obtain these from a trusted IPTV provider.
  5. Latest tvOS Version: Update your Apple TV to the latest software for compatibility.

Step-by-Step Guide: How to Install HotPlayer on Apple TV

Follow these simple steps to install and set up the HotPlayer app on your Apple TV:

Step 1: Open the App Store on Apple TV

  1. Turn on your Apple TV and navigate to the Home Screen.
  2. Locate and select the App Store icon using your Apple TV remote.

Step 2: Search for HotPlayer

  1. In the App Store, click the Search icon (magnifying glass) at the top.
  2. Type “HotPlayer” into the search bar using the on-screen keyboard or Siri voice search.
  3. Select HotPlayer or Hot Player from the search results.

Step 3: Download and Install HotPlayer

  1. On the HotPlayer app page, click the Get or Install button.
  2. If prompted, sign in with your Apple ID to authorize the download.
  3. Wait for the app to download and install on your Apple TV. This typically takes a few seconds, depending on your internet speed.

Step 4: Launch the HotPlayer App

  1. Return to the Apple TV Home Screen.
  2. Find the HotPlayer app icon and select it to open the app.

Step 5: Set Up HotPlayer

  1. Log In or Add Playlist:
    • Upon launching, you’ll be prompted to enter your IPTV provider’s credentials or an M3U/M3U8 playlist link.
    • If you have an M3U URL, go to the Add Playlist option and paste the link.
  2. Configure Settings:
    • Adjust video quality, language preferences, or parental controls in the app’s Settings menu.
    • Use the Lock MAC feature to secure your playlist by locking your device’s MAC address.
  3. Activate the App (if required):
    • HotPlayer may require a one-time activation fee (e.g., approximately $13 USD for lifetime access or 55 MAD for one year). Follow the on-screen instructions or visit the official HotPlayer website to activate.
  4. Test Your Playlist:
    • Load your playlist and check for any errors. If the app detects an invalid M3U link, it will display a warning message.

Step 6: Enjoy Streaming

Once your playlist is loaded, you can:

  • Browse live TV channels, movies, or series.
  • Use the search feature to find specific content by keyword.
  • Create a favorites list for quick access to preferred channels.

Troubleshooting Common Installation Issues

If you encounter issues while installing or using HotPlayer on Apple TV, try these solutions:

  • App Not Found in App Store:
    • Ensure your Apple TV is updated to the latest tvOS version (Settings > System > Software Updates).
    • Double-check the spelling of “HotPlayer” in the search bar.
    • Verify that HotPlayer is available in your region’s App Store.
  • Playlist Not Loading:
    • Confirm that your M3U link or Xtream Codes are valid and active.
    • Check your internet connection for stability.
  • Activation Errors:
    • Visit the official HotPlayer website (hotplayer.app) and enter your device’s MAC address under the Activation tab.
    • Contact HotPlayer support via the Contact Us page if issues persist.
  • Buffering or Playback Issues:
    • Lower the video quality in the app settings to reduce buffering.
    • Use a VPN to mask your IP address, especially if your IPTV provider is region-restricted.

Is HotPlayer Safe and Legal?

HotPlayer is a 100% legal and safe media player as it does not host or provide any content. However, the legality of your streaming depends on the IPTV service you use. Unverified IPTV providers may offer copyrighted content, which could lead to legal issues. To stay safe:

  • Choose a verified IPTV provider.
  • Use a reputable VPN to protect your online privacy and mask your IP address.
  • Avoid sharing your MAC address with third parties to prevent playlist resets.

HotPlayer also emphasizes user privacy by not selling or sharing personal data, such as your name, email, or MAC address.


Tips for Optimizing Your HotPlayer Experience on Apple TV

To get the most out of HotPlayer, consider these tips:

  1. Update Regularly: Check for app updates in the App Store to access the latest features and bug fixes.
  2. Use a High-Speed Internet Connection: A minimum of 10 Mbps is recommended for HD streaming, and 25 Mbps for 4K.
  3. Organize Playlists: Sort channels alphabetically or create a favorites list for quick access.
  4. Enable Parental Controls: Restrict inappropriate content for family-friendly streaming.
  5. Explore the EPG: Use the Electronic Program Guide to plan your viewing schedule.

Frequently Asked Questions (FAQs)

1. Is HotPlayer available for free on Apple TV?

HotPlayer offers a 30-day free trial. After that, a one-time fee (e.g., ~$13 USD for lifetime access or 55 MAD for one year) may be required for full access.

2. Can I use HotPlayer without an IPTV subscription?

No, HotPlayer is a media player that requires an M3U playlist or Xtream Codes from an IPTV provider to stream content.

3. Does HotPlayer support 4K streaming on Apple TV?

Yes, HotPlayer supports HD and 4K streaming, provided your Apple TV and internet connection support these resolutions.

4. How do I contact HotPlayer support?

Visit the Contact Us page on hotplayer.app, provide your name, email, MAC address, and message, and submit your query.

5. Is HotPlayer compatible with older Apple TV models?

HotPlayer requires an Apple TV 4th generation or later, as earlier models do not support the App Store.


Conclusion

Installing the HotPlayer app on Apple TV is a straightforward process that opens up a world of IPTV streaming possibilities. By following this guide, you can quickly set up HotPlayer, add your M3U playlist, and enjoy live TV, movies, and more in high quality. Remember to use a legal IPTV provider and a VPN for a secure streaming experience.

Ready to get started? Head to the Apple TV App Store, download HotPlayer, and transform your streaming setup today! For more details, visit the official HotPlayer website at hotplayer.app.

How to Set Up Televizo IPTV Player on Android

Are you looking for an easy way to stream your favorite TV channels, movies, and shows on your Android device? The Televizo IPTV Player is a powerful, user-friendly app that lets you enjoy IPTV content effortlessly. Whether you’re using an Android smartphone, tablet, or TV box, this guide will walk you through the process of setting up Televizo IPTV Player on Android in just a few simple steps. Optimized for SEO, this article will help you get started quickly while ensuring you have all the information you need.


What is Televizo IPTV Player?

Televizo IPTV Player is a free, open-source app designed for streaming IPTV content on Android devices. It supports M3U playlists and Xtream Codes, making it compatible with most IPTV services. With features like Electronic Program Guide (EPG) support, parental controls, and a sleek interface, Televizo is a top choice for IPTV enthusiasts. However, note that Televizo is just a player—it doesn’t provide content. You’ll need an active IPTV subscription with a playlist or login credentials from your provider to use it.

In this guide, we’ll cover everything from downloading the app to adding your IPTV playlist, ensuring you’re ready to stream in no time.


Why Choose Televizo IPTV Player for Android?

Before diving into the setup process, here’s why Televizo stands out:

  • Free to Use: The base version is completely free, with an optional premium upgrade for extra features.
  • User-Friendly Interface: Easy navigation for beginners and advanced users alike.
  • Wide Compatibility: Works on Android smartphones, tablets, and TV boxes.
  • EPG Support: View TV schedules for supported channels.
  • Parental Controls: Restrict access to specific content.

Buy 1 Year IPTV Subscription and Enjoy Unlimited Content

Now, let’s get started with the setup!


Step-by-Step Guide: How to Set Up Televizo IPTV Player on Android

Follow these steps to install and configure Televizo IPTV Player on your Android device. Whether you’re a tech newbie or a seasoned user, this process is straightforward.

Step 1: Download Televizo IPTV Player

  1. Open the Google Play Store: On your Android device, launch the Google Play Store app.
  2. Search for Televizo: Type “Televizo IPTV Player” into the search bar.
  3. Install the App: Tap the “Install” button next to the official Televizo app by Andrey Menscikov. Wait for the download to complete.
    • Alternative: If you prefer, you can download the APK file from the official Televizo website (televizo.net) and sideload it. To do this, enable “Install Unknown Apps” in your device’s settings under Settings > Security > Install Unknown Apps, then use a browser to download and install the APK.

Step 2: Launch the App

  1. Open Televizo: After installation, tap “Open” from the Play Store, or find the Televizo icon on your home screen or app drawer.
  2. Grant Permissions: The app may request permissions to access storage or media. Tap “Allow” to proceed.

Step 3: Add Your IPTV Playlist

Televizo supports two main playlist formats: M3U URL and Xtream Codes. Here’s how to add yours:

  1. Start Setup: On the app’s main screen, tap “Create Playlist.”
  2. Choose Playlist Type:
    • New M3U Playlist: Select this if you have an M3U URL or file from your IPTV provider.
    • New Xtream Codes Playlist: Choose this if your provider gave you a username, password, and server URL.
  3. Enter Details:
    • For M3U: Paste the M3U URL provided by your IPTV service, or upload an M3U file from your device.
    • For Xtream Codes: Input the server URL, username, and password provided by your IPTV provider.
  4. Save the Playlist: Tap the checkmark (✓) in the top-right corner to save your playlist.

Step 4: Load and Stream Content

  1. Select Your Playlist: Once saved, your playlist will appear on the main screen. Tap it to load the channels and content.
  2. Explore Channels: Browse live TV channels, movies, or shows available through your IPTV subscription.
  3. Start Streaming: Tap any channel or title to begin watching.

Step 5: Customize Your Experience (Optional)

Televizo offers several settings to enhance your viewing:

  • EPG Setup: If your provider supports EPG, go to Settings > Program Guide and enter the EPG URL to view schedules.
  • Favorites: Long-press a channel to add it to your favorites for quick access.
  • Parental Controls: Set up restrictions in the settings (premium feature).
  • Upgrade to Premium: For an ad-free experience and advanced features like backup/restore, purchase the premium version via the Televizo Companion app on Google Play.

Troubleshooting Tips for Televizo IPTV Player on Android

Facing issues? Try these quick fixes:

  • App Won’t Load Playlist: Double-check your M3U URL or Xtream Codes credentials for typos. Ensure your IPTV subscription is active.
  • Buffering Problems: Test your internet speed (a minimum of 10 Mbps is recommended for HD streaming). Restart your router or device.
  • Crashes or Freezes: Update the app to the latest version via the Play Store or clear the app cache in Settings > Apps > Televizo > Storage > Clear Cache.

If problems persist, contact your IPTV provider or email Televizo support at [email protected].


Is Televizo IPTV Player Safe and Legal?

Televizo itself is a safe and legal app, available on the Google Play Store and designed solely as a media player. However, the legality of your streaming depends on your IPTV provider. Ensure you’re using a licensed service to avoid copyright issues. For added privacy, consider using a VPN to encrypt your connection and protect your data.


Final Thoughts on Setting Up Televizo IPTV Player on Android

Setting up the Televizo IPTV Player on Android is a breeze, taking just a few minutes to get you streaming live TV and on-demand content. With its intuitive design, free access, and robust features, it’s an excellent choice for IPTV users. Follow the steps above, add your playlist, and enjoy a seamless entertainment experience on your Android device.

Frequently Asked Questions (FAQ)

  1. How do I download Televizo IPTV Player on Android?
    Search “Televizo IPTV Player” on the Google Play Store and tap “Install.”
  2. What do I need to start streaming with Televizo?
    An active IPTV subscription with an M3U URL or Xtream Codes credentials.
  3. Can I use Televizo for free?
    Yes, the base version is free, with an optional premium upgrade for extra features.
  4. Why isn’t my playlist loading in Televizo?
    Check for typos in your M3U URL or Xtream Codes details and ensure your subscription is active.
  5. Does Televizo support TV program guides?
    Yes, add an EPG URL from your provider in the app’s settings to view schedules.

Have questions or need help? Drop a comment below or reach out to Televizo’s support team. Happy streaming!

How to Set Up IPTV Stream Player on Firestick: A Step-by-Step Guide

The Amazon Firestick has become a go-to device for streaming entertainment, and pairing it with an IPTV Stream Player opens up a world of live TV, movies, and more. If you’re wondering how to set up an IPTV Stream Player on your Firestick, you’re in the right place! This guide will walk you through the process step-by-step, ensuring you can enjoy your favorite content in no time.

What Is IPTV Stream Player?

IPTV (Internet Protocol Television) Stream Player is an app that allows you to stream live TV channels, on-demand movies, and shows using an IPTV subscription. Unlike traditional cable, IPTV delivers content over the internet, making it a flexible and affordable option for Firestick users. Before you begin, ensure you have an active IPTV subscription from a reliable provider, as this will provide the playlist or M3U URL needed for setup.

Why Use IPTV Stream Player on Firestick?

The Firestick’s portability and ease of use make it an ideal device for IPTV streaming. With the right setup, you can access thousands of channels, sports events, and international content—all from your TV. Plus, IPTV Stream Player is lightweight and compatible with Firestick, offering a smooth streaming experience.

Prerequisites for Setting Up IPTV Stream Player on Firestick

Before diving into the installation, gather these essentials:

  • Amazon Firestick: Connected to your TV and powered on.
  • Stable Internet Connection: A minimum speed of 10 Mbps is recommended for smooth streaming.
  • IPTV Subscription: Includes an M3U URL, Xtream Codes, or playlist file from your provider.
  • Downloader App: Used to sideload the IPTV Stream Player app (since it’s not available on the Amazon App Store).

Buy 1 Year IPTV Subscription and Enjoy Unlimited Content

Now, let’s get started!


Step-by-Step Guide to Set Up IPTV Stream Player on Firestick

Step 1: Enable Apps from Unknown Sources

Since IPTV Stream Player isn’t available in the Amazon App Store, you’ll need to sideload it. Here’s how to prepare your Firestick:

  1. From the Firestick Home Screen, go to Settings.
  2. Select My Fire TV (or Device on older models).
  3. Click Developer Options.
  4. Turn on Apps from Unknown Sources.
  5. Confirm by selecting Turn On when prompted.

This setting allows you to install third-party apps like IPTV Stream Player.

Step 2: Install the Downloader App

The Downloader app is a free tool that simplifies sideloading apps onto your Firestick. Follow these steps:

  1. Return to the Home Screen.
  2. Use the search icon (magnifying glass) and type Downloader.
  3. Select the Downloader app from the results and click Download or Get.
  4. Wait for the app to install, then open it.

Step 3: Download IPTV Stream Player

With Downloader ready, you can now install IPTV Stream Player:

  1. Open the Downloader app.
  2. In the URL field, enter the official IPTV Stream Player download link (e.g., a trusted APK source like https://example.com/iptvstreamplayer.apk). Note: Always use a legitimate and safe URL from your IPTV provider or a verified source.
  3. Click Go, and the APK file will begin downloading.
  4. Once downloaded, the Firestick will prompt you to install the app—select Install.

Step 4: Configure IPTV Stream Player with Your Subscription

After installation, it’s time to add your IPTV content:

  1. Open the IPTV Stream Player app from your Firestick’s Apps & Channels section.
  2. You’ll be prompted to input your IPTV subscription details. Choose one of these options:
    • M3U URL: Paste the M3U link provided by your IPTV service.
    • Xtream Codes: Enter the server URL, username, and password from your provider.
    • Playlist File: Upload a playlist file if your provider offers one.
  3. Click Add Playlist or Login (depending on the app version).
  4. Wait for the app to load your channels and content—this may take a few seconds.

Step 5: Start Streaming!

Once your playlist loads, you’re ready to explore! Browse through live TV channels, movies, or shows, and enjoy high-quality streaming on your Firestick. Use the app’s interface to organize favorites or search for specific content.


Tips for a Better IPTV Experience on Firestick

  • Use a VPN: Protect your privacy and bypass geo-restrictions with a reliable VPN like ExpressVPN or NordVPN.
  • Check Internet Speed: Slow buffering? Test your connection and ensure it meets IPTV requirements.
  • Update the App: Regularly check for updates to avoid glitches or compatibility issues.
  • Clear Cache: If the app lags, go to Settings > Applications > Manage Installed Applications > IPTV Stream Player > Clear Cache.

Troubleshooting Common Issues

  • App Won’t Install: Double-check the URL and ensure “Apps from Unknown Sources” is enabled.
  • Buffering Problems: Restart your Firestick or switch to a faster internet connection.
  • Playlist Not Loading: Verify your M3U URL or Xtream Codes with your IPTV provider.

Is IPTV Stream Player Legal on Firestick?

Using IPTV Stream Player itself is legal, but the legality depends on your subscription. Ensure your IPTV service provides licensed content to avoid copyright issues. Always research your provider before subscribing.

Final Thoughts

Setting up IPTV Stream Player on your Firestick is a straightforward process that unlocks endless entertainment possibilities. With this guide, you can install and configure the app in minutes, transforming your Firestick into a powerful IPTV hub. Ready to cut the cord and start streaming? Follow these steps and enjoy!

FAQs

  1. Can I install IPTV Stream Player on Firestick?
    Yes, you can sideload it using the Downloader app since it’s not on the Amazon App Store.
  2. What do I need to start IPTV on Firestick?
    A Firestick, stable internet, an IPTV subscription, and the Downloader app.
  3. How do I add channels to IPTV Stream Player?
    Input your M3U URL or Xtream Codes from your IPTV provider in the app.
  4. Why is my IPTV Stream Player buffering?
    Check your internet speed (10 Mbps minimum) or clear the app’s cache.
  5. Is IPTV Stream Player free to use?
    The app is free, but you need a paid IPTV subscription for content.

Have questions or need help? Drop a comment below, and we’ll assist you!

How to Install IPTV Blink Player on Android TV

IPTV Blink Player is a popular app for streaming live TV channels, movies, and on-demand content using an IPTV subscription. If you own an Android TV and want to enjoy seamless streaming, installing IPTV Blink Player is a straightforward process. In this SEO-optimized guide, we’ll walk you through the steps to install IPTV Blink Player on your Android TV, ensuring you can start watching your favorite content in no time. What is IPTV?


What is IPTV Blink Player?

IPTV Blink Player is a versatile media player designed to work with IPTV services. It supports M3U playlists, Xtream Codes, and other formats, making it a top choice for users who want a smooth streaming experience on Android TV. With its user-friendly interface and robust features, it’s perfect for watching live TV, sports, movies, and more.

Before we dive into the installation process, ensure you have an active IPTV subscription and a stable internet connection for uninterrupted streaming.


Prerequisites for Installing IPTV Blink Player on Android TV

To successfully install IPTV Blink Player on your Android TV, you’ll need:

  • An Android TV (e.g., Sony, TCL, Xiaomi, or NVIDIA Shield) running Android OS.
  • A stable internet connection (Wi-Fi or Ethernet).
  • Access to the Google Play Store or a trusted APK source.
  • Optional: An IPTV subscription with an M3U URL or Xtream Codes.

Top Recommendation:
Discover the ultimate entertainment solution with 7 Days Great IPTV Subscription, designed just for you.


How to Install IPTV Blink Player on Android TV

Follow these simple steps to get IPTV Blink Player up and running on your Android TV:

Method 1: Install via Google Play Store

The easiest way to install IPTV Blink Player is through the Google Play Store, as it’s officially available for Android TV devices.

  1. Turn on Your Android TV
    Power on your Android TV and ensure it’s connected to the internet.
  2. Open the Google Play Store
    Using your remote, navigate to the home screen and select the Google Play Store app.
  3. Search for IPTV Blink Player
    In the search bar, type “IPTV Blink Player” and press Enter. You can use the voice search feature if your remote supports it.
  4. Select the App
    Once the app appears in the search results, click on IPTV Blink Player.
  5. Install the App
    Press the Install button. The app will download and install automatically on your Android TV.
  6. Launch IPTV Blink Player
    After installation, click Open to launch the app, or find it later in your app drawer.

Method 2: Install via APK (Sideloading)

If IPTV Blink Player isn’t available in your region’s Play Store or you prefer using an APK file, you can sideload it onto your Android TV. Here’s how:

  1. Enable Unknown Sources
    • Go to Settings on your Android TV.
    • Navigate to Security & Restrictions or Device Preferences > Security.
    • Enable Unknown Sources to allow apps from external sources.
  2. Download the APK File
    • On a computer or mobile device, search for a trusted source to download the IPTV Blink Player APK (e.g., the official website or a reputable APK provider).
    • Transfer the APK to a USB drive, or use a cloud service like Google Drive.
  3. Install a File Manager
    • Open the Google Play Store on your Android TV and install a file manager app like FX File Explorer or File Commander.
  4. Access the APK File
    • Insert the USB drive into your Android TV or access the APK via the cloud through the file manager.
    • Locate the IPTV Blink Player APK file.
  5. Install the APK
    • Click on the APK file and select Install. Follow the on-screen prompts to complete the installation.
  6. Open the App
    • Once installed, launch IPTV Blink Player from the app menu.

Setting Up IPTV Blink Player on Android TV

After installation, you’ll need to configure the app with your IPTV subscription details:

  1. Launch the App
    Open IPTV Blink Player from your Android TV’s app section.
  2. Add Your Playlist
    • Choose to add an M3U URL, Xtream Codes, or a local playlist file.
    • Enter the details provided by your IPTV service provider (e.g., M3U link or login credentials).
  3. Load Your Content
    Once the playlist is added, the app will load your channels, movies, and TV shows. This may take a few seconds depending on the size of the playlist.
  4. Start Streaming
    Browse through the categories (Live TV, Movies, Series) and select your desired content to start watching.

Tips for a Better IPTV Blink Player Experience

  • Use a VPN: If your IPTV service is geo-restricted, consider using a VPN on your Android TV to bypass limitations.
  • Update the App: Check for updates regularly in the Google Play Store or via the APK source to ensure optimal performance.
  • Stable Connection: For HD or 4K streaming, use a wired Ethernet connection instead of Wi-Fi to avoid buffering.

Troubleshooting Common Issues

  • App Won’t Install: Ensure your Android TV has enough storage space and that “Unknown Sources” is enabled for sideloading.
  • Buffering Issues: Check your internet speed or reduce the stream quality in the app settings.
  • Playlist Not Loading: Verify your M3U URL or Xtream Codes with your IPTV provider.

Why Choose IPTV Blink Player for Android TV?

IPTV Blink Player stands out due to its compatibility with Android TV, customizable interface, and support for multiple playlist formats. Whether you’re a cord-cutter or a streaming enthusiast, this app offers a reliable way to access IPTV content on a big screen.


Conclusion

Installing IPTV Blink Player on your Android TV is quick and easy, whether you use the Google Play Store or sideload the APK. Once set up, you’ll unlock a world of entertainment with your IPTV subscription. Follow the steps outlined above, and you’ll be streaming live TV and on-demand content in no time!

FAQs

  1. Can I install IPTV Blink Player from the Google Play Store?
    Yes, it’s available on the Play Store for most Android TVs.
  2. What do I need to use IPTV Blink Player?
    An Android TV, an IPTV subscription, and a stable internet connection.
  3. How do I sideload IPTV Blink Player?
    Download the APK, enable “Unknown Sources,” and install it using a file manager.
  4. Why isn’t my playlist loading?
    Check your M3U URL or Xtream Codes with your IPTV provider.
  5. Does IPTV Blink Player support 4K streaming?
    Yes, if your subscription and internet speed support it.

Have questions or need help? Drop a comment below, and we’ll assist you with your IPTV Blink Player setup.

How to Install IPTV Blink Player on FireStick

Are you looking to enhance your streaming experience on Amazon FireStick? IPTV Blink Player is a fantastic app that allows you to watch live TV, movies, and shows through an IPTV subscription. In this SEO-optimized guide, we’ll walk you through the process of installing IPTV Blink Player on your FireStick quickly and easily. Whether you’re a beginner or a seasoned FireStick user, this step-by-step tutorial will help you get started.


What is IPTV Blink Player?

IPTV Blink Player is a popular media player designed for streaming IPTV content. It supports M3U playlists and offers a smooth, user-friendly interface to enjoy live TV channels, video-on-demand (VOD), and more. Paired with an IPTV subscription and a device like FireStick, it’s a great way to access entertainment on your TV.

Before we dive into the installation process, note that IPTV Blink Player isn’t available on the Amazon App Store. You’ll need to sideload it using a third-party app like Downloader. Don’t worry—we’ll explain everything below!


Prerequisites for Installing IPTV Blink Player on FireStick

Before you begin, ensure you have the following:

  • An Amazon FireStick device (any version, including FireStick Lite, 4K, or Cube).
  • A stable internet connection.
  • The Downloader app installed on your FireStick (available on the Amazon App Store).
  • An IPTV subscription with an M3U playlist URL (provided by your IPTV service provider).

Top Recommendation:
Discover the ultimate entertainment solution with 7 Days Great IPTV Subscription, designed just for you.


Step-by-Step Guide to Install IPTV Blink Player on FireStick

Follow these simple steps to install IPTV Blink Player on your FireStick:

Step 1: Enable Apps from Unknown Sources

Since IPTV Blink Player isn’t available in the Amazon App Store, you’ll need to allow apps from unknown sources.

  1. From the FireStick home screen, go to Settings.
  2. Select My Fire TV (or Device on older versions).
  3. Click Developer Options.
  4. Turn on Apps from Unknown Sources. If prompted, confirm by selecting Turn On.

Step 2: Install the Downloader App

The Downloader app is essential for sideloading IPTV Blink Player.

  1. Return to the FireStick home screen.
  2. Use the search icon (magnifying glass) and type Downloader.
  3. Select the Downloader app from the search results.
  4. Click Download or Get to install it.

Step 3: Download IPTV Blink Player APK

Now, use Downloader to fetch the IPTV Blink Player APK file.

  1. Open the Downloader app from your FireStick home screen.
  2. In the URL field, enter the following link: [Insert a reliable IPTV Blink Player APK URL here].
    (Note: Ensure you use a trusted source to avoid malware. Check online forums or IPTV communities for the latest APK link.)
  3. Press Go. The APK file will begin downloading.

Step 4: Install IPTV Blink Player

Once the download is complete, the installation process begins.

  1. After the APK finishes downloading, the Downloader app will prompt you to install it.
  2. Click Install when the installation window appears.
  3. Wait for the installation to complete, then select Done or Open.
    (Choosing “Done” takes you back to Downloader, where you can delete the APK file to save space.)

Step 5: Set Up IPTV Blink Player

With the app installed, it’s time to configure it with your IPTV subscription.

  1. Launch IPTV Blink Player from the Your Apps & Channels section on your FireStick.
  2. When prompted, enter your M3U playlist URL provided by your IPTV service provider.
    (Alternatively, you may upload a playlist file if the app supports it.)
  3. Click OK or Submit to load your channels and content.
  4. Wait a moment for the app to fetch your playlist. Once loaded, you’ll see your live TV channels, movies, and shows.

Tips for Using IPTV Blink Player on FireStick

  • Organize Your Content: IPTV Blink Player often allows you to categorize channels or mark favorites for quick access.
  • Stable Internet: For smooth streaming, use a high-speed internet connection (at least 10 Mbps recommended).
  • VPN Recommendation: Since IPTV services may be geo-restricted, consider using a VPN to protect your privacy and unlock content.

Troubleshooting Common Issues

  1. App Won’t Install: Ensure “Apps from Unknown Sources” is enabled and re-download the APK from a trusted source.
  2. Buffering Problems: Check your internet speed or lower the stream quality in the app settings.
  3. M3U URL Not Working: Verify the URL with your IPTV provider—it may have expired or been entered incorrectly.

Why Choose IPTV Blink Player for FireStick?

IPTV Blink Player stands out for its sleek design, reliable performance, and compatibility with FireStick. It’s lightweight, easy to navigate, and perfect for cord-cutters looking to ditch traditional cable TV. With the ability to stream high-quality content, it’s no wonder users love it for their FireStick devices.


Conclusion

Installing IPTV Blink Player on FireStick is a straightforward process that opens up a world of entertainment. By following this guide, you can sideload the app using Downloader, set it up with your IPTV subscription, and start streaming in no time. Ready to enjoy live TV and movies on your FireStick? Get started today!

FAQ

  1. Can I install IPTV Blink Player directly from the Amazon App Store?
    No, you need to sideload it using the Downloader app.
  2. Do I need an IPTV subscription to use IPTV Blink Player?
    Yes, you’ll need an M3U playlist URL from an IPTV provider.
  3. Why does my IPTV Blink Player buffer on FireStick?
    Buffering is usually due to a slow internet connection—check your speed.
  4. Is IPTV Blink Player free to use?
    The app itself is free, but you need a paid IPTV subscription for content.
  5. Can I use a VPN with IPTV Blink Player on FireStick?
    Yes, a VPN can help with privacy and bypassing geo-restrictions.

Have questions or run into issues? Drop a comment below, and we’ll help you out!