Author: cusergreatiptv

Common Reasons Why You Need to Clear Cache Data on Samsung TV

Do you need to clear the cache on your Samsung Smart TV? Clearing the cache on your electronic devices can help make them run faster, protect them from malware and viruses, and improve app performance. You’ve probably heard about how to clear the cache on your web browsers, computers, and mobile phones. But how do you clear the cache on your smart TV? You may be able to clear your cache data by performing a soft reset on your TV. If that doesn’t work, you can easily clear your cache in the Settings menu. The process may vary depending on what model your TV is.

What Is A Cache?

Caches are simply temporary storage locations for frequently-used data. This is done to expedite the time it takes for a computer or other machine to access certain information. Think of caches like short cuts – once a cache is created, your device knows exactly where to look instead of taking additional time to search the web or hard drive again. Caches can be beneficial in saving on processing power and making sure your device runs more efficiently.

What Does Clear Cache Mean?

The cache on your Samsung TV is a space where the TV stores temporary data from apps and websites that you access. This data is intended to make those apps and websites run faster and more efficiently, but over time, the cache can become cluttered and cause problems.

How To Clear Cache On Samsung TV?

Here are 11 ways to clear the cache on your Samsung TV:

1 | Restart your TV

Sometimes, simply restarting your TV can clear the cache and resolve any issues that you’re experiencing. To do this, unplug the power cord from the back of your TV, wait 30 seconds, and then plug it back in.

2 | Update your TV’s software

Your Samsung TV may have a software update available that includes bug fixes and performance improvements. Updating your TV’s software can also help to clear the cache and improve its performance. To check for updates, go to your TV’s settings and select “Software Update.”

3 | Clear the app cache

Many of the problems that can be caused by a cluttered cache can be resolved by clearing the app cache. To do this, go to your TV’s settings and select “Apps.” From there, you can select the app that you want to clear the cache for and choose “Clear Cache.”

4 | Clear the browser cache

If you use your Samsung TV to access the internet, you can also clear the cache in your TV’s built-in browser. To do this, open the browser and go to the “Settings” menu. From there, you can select “Clear Browsing Data” and choose to clear the cache.

5 | Clear the cache in individual apps

Some apps, such as Netflix, have their own options for clearing the cache. To clear the cache in these apps, you can usually find the option in the app’s settings or in the app’s menu.

6 | Reset your TV to factory settings

If none of the above methods work, you can try resetting your TV to its factory settings. This will erase all of the data on your TV, including the cache, and restore it to its default state. To do this, go to your TV’s settings and select “Support,” then “Self Diagnosis,” and finally “Reset.”

7 | Use a cache cleaning app

There are several apps available on the Samsung TV app store that can help you clear the cache on your TV. These apps can be especially useful if you’re not sure how to clear the cache manually.

8 | Clear the cache in the Smart Hub

The Smart Hub is the main menu on your Samsung TV, where you can access all of your TV’s apps and features. To clear the cache in the Smart Hub, go to the Smart Hub, select “Settings,” and choose “Clear Cache.”

9 | Uninstall and reinstall apps

If you’re having problems with a specific app, you can try uninstalling it and then reinstalling it. This can help to clear any corrupted data that may be causing the app to function improperly. To do this, go to your TV’s settings and select “Apps,” then choose the app that you want to uninstall and select “Uninstall.”

10 | Use a USB drive to clear the cache

If you have a USB drive, you can use it to clear the cache on your Samsung TV. To do this, save the cache cleaning app that you want to use to your USB drive, and then plug the USB drive into your TV. You can then run the app from the USB drive to clear the cache.

11 | Use a different internet connection

If you’re having problems with your TV’s internet connection, you can try using a different connection, such as a different Wi-Fi network.

Can This Improve My Screen Mirroring Experience?

Yes, clearing the cache on your Samsung smart TV can improve your screen mirroring experience. The cache on your TV is a space where the TV stores temporary data from apps and websites that you access. Over time, this data can become cluttered and cause problems, such as slow performance or connectivity issues. By clearing the cache, you can remove this cluttered data and improve the overall performance of your TV, including the screen mirroring feature. This can help to reduce lag and improve the overall quality of the mirrored content.

Are you using screen mirroring apps from AirBeamTV? Then clearing the cache on your devices can sometime be beneficial. This includes clearing the cache on your phone, if that is the place where the screen mirroring app is installed.


Great Premium IPTV Subscription

Great IPTV is Premium IPTV provider with more than 12,000 channels and more than 9,700 VOD a private server using +10Gbps Network, we at Great IPTV are looking forward to Help All IPTV Users to enjoy their IPTV Subscription, we have Premium IPTV Subscription Which you can BUY Great IPTV Premium Subscription From Here

What is FireStick Cache?

FireStick lets you download and use a wide range of apps for streaming and other purposes. You can install these apps from Amazon App Store.

Almost all the FireStick apps create a cache, which is saved on your device storage. The cache file is created when the app is running. It is supposed to be temporary and delete itself when the app is closed. However, this is not always the case. The cache files continue to accumulate and over time occupy sizeable storage space.

The following tutorial will show you How to Clear Cache on Firestick & Fire TV and enjoy smoother playback on your device.

This process will take less than a minute and can be accomplished in only 3 simple steps which we provide screenshots for below.

Clearing the Cache on your Firestick device is a great way to improve the overall device performance and boost your streaming experience.

Users can easily clear the cache for any Firestick App installed including those which have been sideloaded.

How to Clear Cache on Firestick/Fire TV :

In the guide below, we are using a Fire TV Stick 4K Max.

However, this will also work for any variation of Firestick including Firestick Lite and Fire TV Cube.

In the guide below, we will clear cache on Firestick by clearing various Streaming Apps.

This will reset the app itself and remove/clean up junk files, history, and more for the application.

Users are unable to clear cache on the firestick device itself, however, the best way to refresh the entire device is by restarting it using the guide below.

How to Restart Firestick

If you are still encountering slow speeds and issues, we suggest a factory reset which will wipe your device completely and return it to its original state.

How to Clear Cache on Firestick/Fire TV

In the guide below, we will clear cache on Firestick for the Downloader Application.

Downloader is used by millions of cord-cutters to install various apps and APKs that are not available within the Amazon App Store.

1. From the home screen of your device, hover over Settings and choose Applications.

2. Click Manage Installed Applications.

3. Find the app you wish to clear cache for and select it.

4. Scroll down and click clear cache.

5. You can also select clear data to reset/refresh your preferred app completely.

6. Click clear data again.

That’s it!

You have successfully cleared the cache for an app on your firestick device.


Great Premium IPTV Subscription

Great IPTV is Premium IPTV provider with more than 12,000 channels and more than 9,700 VOD a private server using +10Gbps Network, we at Great IPTV are looking forward to Help All IPTV Users to enjoy their IPTV Subscription, we have Premium IPTV Subscription Which you can BUY Great IPTV Premium Subscription From Here

In this tutorial, we are going to show you how to change the DNS on your IPTV devices such as MAG, different Smart TVs, Android, and iOS. Changing your DNS settings is usually mentioned as one of the simplest ways to optimize your internet speed and solve many issues you might encounter while streaming IPTV channels. What is Internet streaming?

DNS servers play a major role in IPTV streaming. While there are no mandatory tasks to improve internet speeds, we can make many smaller tweaks and improvements. These improvements work together to increase our overall internet speed and the DNS servers play an essential role. What is IPTV?

Before you change to any DNS address, make sure you write down your current DNS address so you can keep these numbers in case you need to get back to your original settings.
If your original settings were set to “Automatic”, just change your DNS settings back to “Automatic”. This applies to all the devices mentioned in this article.

How to change DNS on a Samsung Smart TV

Step 1: Press the “Menu” button on your remote control. Under “Settings menu” select “Network” (1) then choose “Network Status”.

Step 2: After a few seconds you will see 3 buttons. Select the “IP Settings” and proceed to the next step.

Step 3: Choose “DNS setting”. Select “Enter manually”.

Now enter the below DNS Address and click “OK “.

DNS Addresses:
Cloudflare DNS: 1.0.0.1 or 1.1.1.1
Google DNS: 8.8.8.8 or 8.8.4.4
Open DNS: 208.67.222.222 or 208.67.220.220
DNS Watch: 82.200.69.80 or 84.200.70.40

Restart your Samsung Smart TV to allow the configuration to take effect.

How to change DNS on a LG Smart TV

Step 1:  Press the Menu button on your remote control Select “Settings” and select “All settings”.

Step 2: Scroll down to the “Network” submenu and select “Network Connection” and press on “Set Expert“.

Step 3: Under “IP Mode” press “Dynamic”. Under “DNS Server” choose “Manual”.

Now enter the below DNS Address and click “OK “.

DNS Addresses:
Cloudflare DNS: 1.0.0.1 or 1.1.1.1
Google DNS: 8.8.8.8 or 8.8.4.4
Open DNS: 208.67.222.222 or 208.67.220.220
DNS Watch: 82.200.69.80 or 84.200.70.40

Restart your LG Smart TV to allow the configuration to take effect.

How to change DNS on a Sony Smart TV

Step 1: Press the “Home” button on your remote. Select Setup and press on Network.

Step 2: Press on “Network Setup”.

Step 3: Select “Expert”.

Step 4: Choose “Wi-Fi” or “Wired LAN” depending on your connection.

Step 5: Choose “Status Info”.

Step 6: Write down your” IP address”.

Step 7: Go back to the network and choose “Advanced options”.

Step 8: Press or click on “IP settings”.

Step 9: Now Select “Static”.

Step 10: Enter the first three groups of numbers of your IP address. For instance, if your IP address is “192.166.1.1″, enter “192.166.1.”. For the fourth group of numbers, you can enter “50” so the final IP address will look like “192.166.1.50” and click on “Next

Step 11: For the “Gateway” enter the full IP address of your router and click on “Next”.

Step 12: Enter “24” for the “Network Prefix Length” then click on “Next”.

Step 13: Enter your Preferred DNS and click on “Next”.

Step 14: For DNS 2 enter one of the Alternate DNS addresses and click on “Next”.

Press “OK” and you are done.

DNS Addresses:
Cloudflare DNS: 1.0.0.1 or 1.1.1.1
Google DNS: 8.8.8.8 or 8.8.4.4
Open DNS: 208.67.222.222 or 208.67.220.220
DNS Watch: 82.200.69.80 or 84.200.70.40

Restart your Sony Smart TV to allow the configuration to take effect.

How to change DNS on a Apple TV device

Step 1: Press or click on the “Settings” menu on your Apple TV device and select “Network”.

Step 2: Now click on the “Network”.

Step 3: Click on “Wi-Fi”.

Step 4: Choose your Wi-Fi Connection.

Step 5: Scroll down and select the “Configure DNS” option.

Step 6: Choose “Manual” when you are asked to choose between Manual or Automatic.

Step 7: In the DNS field pls enter the DNS Server address. Important! You should enter 3 digits for each cluster.
I.E. for DNS 1.11.111.123 you should enter 001.011.111.123. Click “Done

Step 8: Your Smart DNS is set up, and nearly done, For that, go back to “Settings” and select “General”.

Step 9: Find the “Region Format” option and press on it.

Step 10: Select for Example “The United States” from the list of options.

Go back to the main screen and select “Settings”. Use the “Sleep Now” command.
Unplug the Apple TV power cord and wait 10 seconds. Then plug the Apple TV back in.

DNS Addresses:
Cloudflare DNS: 1.0.0.1 or 1.1.1.1
Google DNS: 8.8.8.8 or 8.8.4.4
Open DNS: 208.67.222.222 or 208.67.220.220
DNS Watch: 82.200.69.80 or 84.200.70.40

Restart your Apple TV to allow the configuration to take effect.

How to change DNS on a iPhone

Step 1: Go to “Settings”.

Step 2: Choose the network that you are using.

Step 3: In the DNS field enter the DNS Server addresses.

DNS Addresses:
Cloudflare DNS: 1.0.0.1 or 1.1.1.1
Google DNS: 8.8.8.8 or 8.8.4.4
Open DNS: 208.67.222.222 or 208.67.220.220
DNS Watch: 82.200.69.80 or 84.200.70.40

Step 4: Go back to Wi-Fi to save your changes.

How to change DNS on a iPad

Step 1: Go to your iPad settings. Now click on “Wi-Fi” and select the network you are connected to.

Step 2: In the DNS field enter the DNS Server address. Tap on “Wi-Fi” from the upper left corner to save your settings.

DNS Addresses:
Cloudflare DNS: 1.0.0.1 or 1.1.1.1
Google DNS: 8.8.8.8 or 8.8.4.4
Open DNS: 208.67.222.222 or 208.67.220.220
DNS Watch: 82.200.69.80 or 84.200.70.40

Step 3: Go back to Wi-Fi to save your changes.

How to change DNS on a Android device

Step 1: Go to “Settings”.

Step 2: Select “Wi-Fi” and Press and hold active wireless network until a dialog pops up.

Step 3: Press on “Modify network config”.

Step 4: Check “Show advanced options”.

Step 5: Change “IP settings” to “Static”.

Step 6: In the “DNS 1” and “DNS 2” fields enter the DNS Server address and Press on “Save”.

DNS Addresses:
Cloudflare DNS: 1.0.0.1 or 1.1.1.1
Google DNS: 8.8.8.8 or 8.8.4.4
Open DNS: 208.67.222.222 or 208.67.220.220
DNS Watch: 82.200.69.80 or 84.200.70.40

Restart your device and Enjoy.

How to change DNS on a MAG device

Step 1: Go to “Settings”.

Step 2: Now select “System Settings”.

Step 3: Now choose Network and press on “Auto (DHCP), manual DNS“.

DNS Addresses:
Cloudflare DNS: 1.0.0.1 or 1.1.1.1
Google DNS: 8.8.8.8 or 8.8.4.4
Open DNS: 208.67.222.222 or 208.67.220.220
DNS Watch: 82.200.69.80 or 84.200.70.40

Restart your device and Enjoy.

Let us know in the comments section below about your opinion and feedback concerning this article. Thank you in advance.


Great Premium IPTV Subscription

Great IPTV is Premium IPTV provider with more than 12,000 channels and more than 9,700 VOD on a private server using +10Gbps Network, we at Great IPTV are looking forward to Help All IPTV Users to enjoy their IPTV Subscription, we have Premium IPTV Subscription Which you can BUY Great IPTV Premium Subscription From Here

connecting paid IP television

A major drawback of cable and satellite TV is that they are continuous live broadcasts you can’t pause or rewind. That’s not a problem with IPTV. Today, we will go through what an IPTV service is and how it can improve the quality of your life.

How does paid IPTV work?

IPTV is the delivery of television content over Internet Protocol (IP) networks. It uses your internet service provider’s (ISP) infrastructure for streaming content as a live feed or on-demand. To use an IPTV service, you need a broadband internet connection and a device to view IPTV content on, e.g., a desktop PC, laptop, smartphone, or Smart TV device.

Do I need to get a new TV, or is an older one OK?

You can easily get IPTV on older TV models, too, but you will need a set-top box. A set-top box decodes the digital signal and puts the resulting picture on your TV screen. You can connect the set-top box to your TV with an HDMI or composite video cable.

Which set-top is the best for that?

Set-top boxes powered by Linux, Android, Windows, or any other platform are great for IPTV. However, the most feature-packed of them would be the Android TV boxes, among which is Infomir’s MAG425A. This particular device plays 4K content, supports voice search, and has access to Google services and the Google Play Store. Being certified by Google, it enjoys great sales in the USA and Europe.

What does IPTV give?

IPTV channels support video resolutions of up to 4K and 8-channel sound, as well as subtitles and multiple audio tracks for videos. They also enable viewers to time-shift live broadcasts of their favorite TV shows.

IPTV is interactive television. Viewers can watch films and TV shows in live mode or record them to watch later. IPTV offers higher-quality content as compared to traditional analog or digital broadcasts as well as lower subscription fees as compared to satellite TV. IPTV services are offered by internet service providers. The subscriber needs only to select their desired channel package and pay the provider’s fee.

What internet speeds does IPTV require?

Usually, providers indicate the connection speed required for disruption-free services. And this requirement needs to be satisfied if you want to avoid the frustration that comes with stuttering and freezing video playback. Usually, 5 Mbit/s is enough to watch SD video content. For HD videos, at least 10 Mbit/s would be needed.

On low connection speeds, you are better off choosing lower video quality or starting playback after the video has been cached. Also bear in mind that apps running in the background and other devices connected to your Wi-Fi may affect the experience, too.

How do I connect?

Study the plans offered by local IPTV operators, choose the one that suits you most, and place an order. After the provider allocates an IP line, you will need to connect it to your router. The next thing to do is hook up your set-top box to the router (via Ethernet cable or Wi-Fi). Then connect the set-top box to your TV and set it up.

Finally, you need to activate your subscription and get a downloadable playlist or a dedicated IPTV app from your provider.

Is paid IPTV legal?

If the set-top box has no apps for watching pirated content installed, IPTV is considered legal. Any third-party apps that provide access to pirate resources violate copyright law.

IPTV is what you need if you enjoy being able to choose the content you want to watch with both high-quality video and sound. It is an excellent substitute for expensive cable or satellite TV that puts the world of modern television at your fingertips.


Great Premium IPTV Subscription

Great IPTV is Premium IPTV provider with more than 12,000 channels and more than 9,700 VOD a private server using +10Gbps Network, we at Great IPTV are looking forward to Help All IPTV Users to enjoy their IPTV Subscription, we have Premium IPTV Subscription Which you can BUY Great IPTV Premium Subscription From Here

How to Install Flix IPTV on FireStick

Flix IPTV is not available on the Amazon app store as mentioned before. So we have to install Flix IPTV on Firestick by using the Downloader app.

We have to make some changes to the Firestick device settings so we can download and install the Flix IPTV on Firestick by outsourcing APK files.

1. Switch on your FireStick and go to the home page.

2. Scroll to Find.

3. Select Search. A virtual keyboard will appear.

4. Type Downloader using the virtual keyboard or using the Alexa voice assistant on your remote.

5. Find and select Downloader among the search results. You can recognize the app by its orange background.

6. Select Get or Download to install the app on your FireStick.

As I mentioned above, we will use Downloader to sideload and install Flix IPTV on the FireStick. But before we can proceed, we need to change some FireStick settings.

7. Press and hold the home button on your FireStick remote.

8. Go to Settings.

9. Scroll down and select My Fire TV.

10. Select Developer Options from the following menu.

11. You will see Apps from Unknown Sources. It’s disabled by default. Turn it on.

12. Go back to the FireStick home page. Find and open Downloader.

13. Select the Enter a URL box.

14. Type app.flixapp.tv and select the Go button.

15. Downloader will start downloading the APK file from the web.

16. You will be prompted when the download completes. Select Install.

That’s it. You have successfully installed Flix IPTV on your FireStick. If you wish, you may now delete the APK file from your device.

Before you start integrating IPTV services into the Flix IPTV app, let’s explore the legal status of the app, as well as a trick to keep you out of legal trouble in the future.

Is Flix IPTV Legal?

Here’s where it gets tricky. On the surface, Flix IPTV is legal to download and use. But if you dig deeper, you may discover problems with certain content in certain regions. Let me elaborate.

Some of the live TV channels, TV series, and movies you can consume on Flix IPTV may be licensed by some other media company within your country. This means that the company would have exclusive rights to stream the content in the region. If you try to stream the copyrighted content in the country, it may put you in legal jeopardy.

The thing is, your government and ISP providers can see what you watch on your FireStick. Unintentionally streaming illegal content can leave you vulnerable.

We do not encourage the violation of copyright laws. However, what if you end up accidentally streaming content from an illegitimate source? For a typical user, it’s not easy to tell the difference between a legal and an illegal source.

Thankfully, there is a way to avoid this situation on your FireStick. Using service, ExpressVPN, you can mask your online identity. We advise using ExpressVPN due to its blazing fast speeds, its native FireStick app, and its airtight security protocols, so you can try it risk-free.

How to Use Flix IPTV on FireStick

As I mentioned above, Flix IPTV is simply an IPTV player that can play content from IPTV services/providers. By default, you won’t find any content in the app to stream. You will have to integrate IPTV services using your login details before you can create a playlist. Follow the steps below.

1. Go to your FireStick home page and scroll to Your Apps and Games.

2. Scroll down to Flix IPTV and select the app to open it.

3. In the left-hand menu, navigate to Settings.

4. On the following menu, scroll down to User Account.

5. On the User Account screen, take note of the Mac address.

6. Open a web browser on your desktop or phone and navigate to the following address: https://flixiptv.eu/mylist

7. This Flix page will ask you to fill in the Mac address and URL link for the IPTV service. When you subscribe to an IPTV service, it will send login details and a URL, sometimes called an M3U link, to the email address you used to register. It will look something like the example below:

http://iptv-line.com:7899/get.php?username=Tbgzto4QJ&password=LuSL5g87X&type=m3u_plus&output=ts

8. After adding the information, click the Send button and you are good to go.

9. Open Flix IPTV on your FireStick and you will see the connected IPTV provider in the app.

Now that you have added the IPTV provider to Flix IPTV.


Great Premium IPTV Subscription

Great IPTV is Premium IPTV provider with more than 12,000 channels and more than 9,700 VOD a private server using +10Gbps Network, we at Great IPTV are looking forward to Help All IPTV Users to enjoy their IPTV Subscription, we have Premium IPTV Subscription Which you can BUY Great IPTV Premium Subscription From Here

Do I Need a VPN for IPTV?

You may be wondering: “Do I need a VPN for IPTV?”

Although using a VPN with IPTV is not mandatory, you may need it to watch geo-restricted content and reduce buffering.

What Is IPTV?

IPTV or Internet Protocol Television is a service that offers TV programming, pay-per-view, streaming, and other video content services via the TCP/IP (Transmission Control Protocol/Internet Protocol) suite, as opposed to cable and broadcast TV, or satellite.

The service is typically provided over a dedicated network in a single format (sends one program at a time) unlike traditional cable which is broadcast in a multicast format.

Do You Need a VPN For Streaming?

Whether you need a VPN for IPTV depends on a variety of factors, including:

Geo-restricted content

When traveling outside of the country or state, you may not be able to access certain content that’s only available in certain regions.

For example, Hulu is not available to users outside of the US and Netflix has different libraries for different locations. A VPN will help you bypass the geo-restrictions and watch your favorite shows, regardless of your location.

Privacy protection

The main advantage of IPTV is that you can watch TV and on-demand content anywhere at any time. But doing so while being connected to a public Wi-Fi or anywhere where the connection is less safe can put you at risk of malware and hacking attempts.

A VPN will hide your IP address and encrypt your traffic, making it much more difficult for someone to spy on your online activities.

Reduced buffering

Streaming typically takes a lot more data compared to other online activities. And if you’re using too much data on activities like streaming or torrenting, your ISP may throttle your bandwidth to regulate traffic and prevent network congestion, which will slow down your Internet speed. Using a VPN will prevent your ISP from seeing where that traffic is going.

Stream on restricted networks

Many public networks restrict Internet usage to browsing because activities like streaming use a lot of bandwidth. With a VPN, you might be able to hide your activity and circumvent the restrictions in place.

Is IPTV Safe Without a VPN?

Unless you’re getting your content from a provider that’s unlicensed or accidentally come across content that violates any copyright rules – which is highly unlikely with a legitimate provider– watching IPTV is safe, even without a VPN.

What’s not safe is connecting to public Wi-Fi and other suspicious networks without a VPN, regardless of whether you’re using IPTV services or not.

Using IPTV is legal in the US. The only way you can get in trouble is if your provider hasn’t bought the appropriate licenses for streaming content and is infringing copyright laws.

Even then, companies rarely go after individual users (and would instead sue the provider) but your ISP may throttle your connection– unless you’re using IPTV with a VPN.

Best VPNs to Use IPTV

Using a VPN while connected to IPTV Is not mandatory, but it doesn’t hurt to know that your connection is private.

The top five VPNs for IPTV are:

NordVPN

NordVPN is one of the best VPNs for streaming and bypassing geo-restricted content thanks to its more than 5,000 servers and advanced privacy tools.

With NordVPN, users can utilize features like multi-hop, split tunneling and DNS leak protection and can connect up to six devices from one account.

The VPN is more affordable if you opt for one of the multi-year plans and includes a 30-day money-back guarantee for anyone that wants to give it a try.

ExpressVPN

ExpressVPN offers a wide network of servers across more than 90 countries from around the globe and boasts one of the fastest VPN speeds you can find on the market.

This makes it an excellent pick for streaming IPTV channels and on-demand content.

With its military-grade encryption, no DNS leak feature, and a handful of tunneling protocols to choose from, Express VPN offers a great deal for users that prioritize privacy and security.

The VPN works on almost all devices and you can get up to five simultaneous connections on a single subscription.

CyberGhost

CyberGhost is an excellent choice for first-time VPN users and anyone who’s looking for a user-friendly VPN app that doesn’t sacrifice functionality at the cost of simplicity.

The VPN boasts nearly 6,000 servers in 90 countries and lets users choose between several protocols, including OpenVPN, which is currently the most secure one on the market.

CyberGhost allows up to seven simultaneous connections and unlike most VPN providers, it  has a 45-day money-back guarantee on its pricing plans.

IPVanish

IPVanish is a reliable VPN service with a zero-logs policy and decent speeds.

The VPN only has around 1,600 servers in 60 countries and more than 40,000 IP addresses for its users, which is fewer than its competitors but still solid considering its pricing plan.

IPVanish allows for torrenting, can scramble/ obfuscate traffic, and supports multiple protocols, including IKEv2, L2TP, SSTP/PPTP, and OpenVPN.

One of its biggest advantages is that it offers unlimited connections and can unblock certain restricted content– but not Netflix.

StrongVPN

StrongVPN has a strict no-logs policy, meaning it doesn’t connect any data, fast speeds, and an expansive network of servers in the US.

It has 12 simultaneous connections, which is more than the industry standard, and is compatible with most devices, including both Android and Mac.

This VPN allows for torrenting, has a kill switch feature, and offers a long list of tunneling protocols. The only downside is that it doesn’t have a multi-hop feature, which is rarely used for streaming.

Should You Use Paid VPN or Are Free VPNs Good Enough?

Free VPNs are typically good enough for browsing, but they’re unlikely to unblock geo-restricted content.

What’s more, most of the free VPN services collect user data, with a few exceptions like the privacy-friendly ProtonVPN, and they also significantly slow down your Internet speed because they offer limited servers that are often overcrowded.

If that’s not good enough for you, check out our picks for the best VPNs.

Bottom Line

IPTV’s boom in popularity is the result of people’s growing interest in on-demand TV and content. And since IPTV services are provided online, a VPN is an excellent option to make sure that you keep your online activities from your ISP providers and snoopers.

Getting a VPN is not necessary for connecting to IPTV, but you might need it to reduce buffering and get access to geo-restricted content.


Great Premium IPTV Subscription

Great IPTV is Premium IPTV provider with more than 12,000 channels and more than 9,700 VOD a private server using +10Gbps Network, we at Great IPTV are looking forward to Help All IPTV Users to enjoy their IPTV Subscription, we have Premium IPTV Subscription Which you can BUY Great IPTV Premium Subscription From Here

In this tutorial, we will explain you step by step how to setup on MYTV Online on Formuler Z7+.

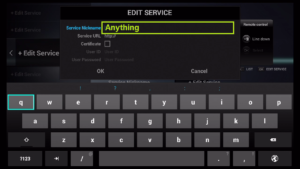
1> Open MYTV Online

2> Edit Service >> Click Edit
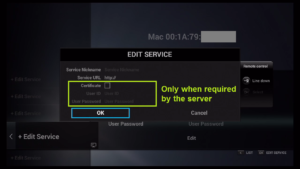
Important: Be sure you register with your right MAC Address.

3> Enter Service Nickname (Example: Name or Anything)

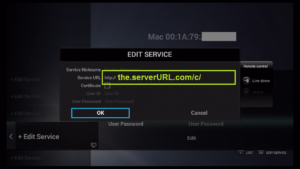
4> Enter our Mag URL:

http://iptv-line.com:7899/c/

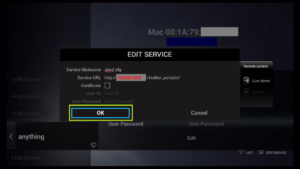
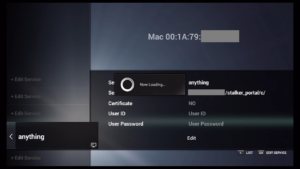
5> Click OK

6> Connecting to our Server MAG in progress.

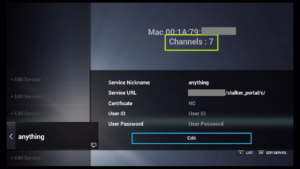
7> Successful Connection! You receive all channels associated with your account.

8> Now Everything is ready and you can start watching Live TV.

Great Premium IPTV Subscription

Great IPTV is Premium IPTV provider with more than 12,000 channels and more than 9,700 VOD a private server using +10Gbps Network, we at Great IPTV are looking forward to Help All IPTV Users to enjoy their IPTV Subscription, we have Premium IPTV Subscription Which you can BUY Great IPTV Premium Subscription From Here

Setup IPTV on PS4

This tutorial aims to get you acquainted with how to use Plex on your PS4to stream IPTV channels.
Plex is a Media Server program for general users and utilizing it doesn’t demand a high level of technical knowledge compared to its other competitors. Plex allows the users to stream media content from their home network to all compatible devices.

An overview of Plex

Plex appears as a media playback system that enables the users to simply share their movies, TV series, songs, photos, and fundamentally any multimedia content that they have in storage.

By installing the Plex Media Server to a PC on your personal network and adding media contents to your libraries, the server will retrieve the information concerning the library. Once that’s completed, you can connect a player App (In Plex its called Client) to the PC in the living room, your mobile, tablets, etc.

Host your Media Contents in a Central Location

In order to use Plex and make it functional, you must establish the server on a PC somewhere in your house. Without establishing a server, the Apps won’t be capable to play any media contents. That process might appear a little bit complicated, however, the advantages it gives are enormous. In our personal experience, the first time when we load up the plex, it was extraordinary and exciting to use.

Easy Sharing

Combining an App to your Plex structure is easy. First, you must install the App, start it and see it as it discovers the Plex servers on the network. The server transmits the App details about your personal media library and its ready to watch. The excellent thing about this part is that, when the server is installed correctly and is up and running, you don’t need to take any extra steps. It actually needs a few seconds to get the App identify the contents and play them.

Centralized Control

Holding all your contents stored by a central server indicates that you have a singular place to control your media content collection. You have the ability to add new movies, or simply edit the poster picture being used for your beloved TV series. Every feature of the server is controlled via the Plex Web App.

It operates in a web browser from anywhere in your house, therefore you don’t have to be at a particular place to contrive your media library. When a modification is performed, it’s instantly available to all the Apps in your house without taking any further actions.

Keep Record of What You’ve Watched

The server retains track of what you have viewed, or are in the progress of watching. Each archive has a “watched” state sign that allows you to know that you have or haven’t watched the content.

Additionally, if you stopped watching in a middle of a show, it recognizes where you left off and attempts to take up from where you stopped. This feature appears on any App, not just the one you started watching the content on in the first place.

How to bring IPTV channels to PS4 using Plex

Step 1: Start by downloading the Notepad++ and Install it to move to the next step.
Download:

https://notepad-plus-plus.org/download/v7.1.html

Step 2: Now proceed to  https://www.plex.tv/  and create an account. As we stated in the above article, with plex you can stream movies, music, and pictures from your computer, but this guide will going to focus on IPTV for PS4.

Step 3: After creating your account, go to the “Downloads” section and look for “Plex Media Server” and download it.

Step 4: After downloading and installing Plex, you can go ahead and launch it.

Step 5: Now you need the IPTV plugin for Plex. You can download the IPTV plugin for Plex by clicking here.

Step 6: After extracting the folder, you must paste the whole folder (IPTV.bundle-master) in this location:

C: /users/"your computer username"/AppData/Local/Plex Media Server/Plug-ins

Step 7: After extracting the zip file, you will see a subfolder called contents, inside that folder, there is a file called info (.plist). Do a Right click on this file and select the option “edit with Notepad++”, you will notice this image:

Step 8: Now you must remove the bold section of the line:

<!--<string>UseRealRTMP</string>-->

and leave only

<string>UseRealRTMP</string>

just like the below image:

Step 9: Enter the folder “Contents” and open “resources”. Here you must download your M3U playlist and replace it with the playlist file which already exists in this folder.

Step 10: Move back to the folder “IPTV.bundle-master” and rename it to “IPTV.bundle”

Step 11: The PC part is done for now. Turn on your PS4, open the store and search for PLEX and download it.

Step 12: After downloading and launching Plex on PS4, you need a code to sign in to your account which you can go to  https://plex.tv/link  and enter it.

Step 13: As the final step, open Plex in your computer and then in your PS4 in order to watch the channels that you added earlier.

Please note:
*The Plex needs to be opened all the time on your computer before watching the channels in your PS4.
*Don’t forget to close and restart PLEX on both PC & Playstation after updating the playlist.m3u inside the resources folder.
*The channels are also available to stream on your phones & tablets through the Plex app on your PC.


Great Premium IPTV Subscription

Great IPTV is Premium IPTV provider with more than 12,000 channels and more than 9,700 VOD a private server using +10Gbps Network, we at Great IPTV are looking forward to Help All IPTV Users to enjoy their IPTV Subscription, we have Premium IPTV Subscription Which you can BUY Great IPTV Premium Subscription From Here

Steps to install and configure IPTV on Buzz TV buzz lightyear

he BuzzTV is packed in a plain-looking black box but it comes off as clean and moderately detailed. At the top of the box, you will see BuzzTV written in the middle of the space.  All the sides of the box are left black and beneath this, you’ll see all of the features that the product sports, as well as the package contents. BuzzTV comes with an embedded Android operating system and it can also be utilized as an STB emulator.

BuzzTV setup box can be also utilized with an M3U playlist. You can download an application from the Google Play store such as GSE or Perfect Player app and insert your M3U playlist.

How to set up IPTV on your Buzz TV buzz feed

There are few simple steps that you should follow to set up a new IPTV connection on Buzz TV. Before taking a look at the steps, you will need to obtain an IPTV subscription. If you haven’t purchased your IPTV subscription yet, you will need to get in touch with a service provider and obtain the subscription you want.

When you make the payment and buy the new IPTV subscription, you will be getting a M3U file into the email. You should have this M3U URL along with you before you proceed to the next steps of configuring Buzz TV. Hence, ensure that you have the M3U URL before you proceed with the following steps to get the job done.

If you are ready, you can follow these steps and get the job done.

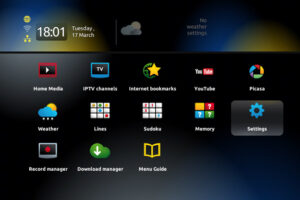
Step 1: On the main menu, click on “Settings” as depicted in the below picture.
Step 2: Now click on “Servers” and proceed to the next step.

Step 3: Now you must insert your “Server URL” as well as adding a name (It can be any name you want) and click on “Connect“. You can also use username and password from your M3U with options line and connect to your IPTV servers by clicking on the “Use Credentials” box, however, connecting to the servers through the MAG portal is way simpler.

Please note, the server URL is provided by your IPTV distributor and the mac address of your device must be registered inside the IPTV providers server.

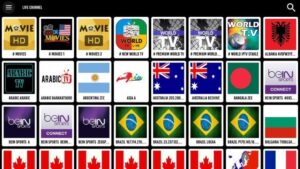
Step 4: After clicking on “Connect“, the channels will immediately pop up and you can click on any channel and start the stream.

Step 5:

You can see the channel list on the left hand column of your Buzz TV interface. One of the benefits associated with Buzz TV is that it will help you to see the content or channels in a categorized view. You can see the different categories such as English, Spanish and Sports. Once you open a category, you can see all the channels that fall under it. It is up to you to select a channel and then proceed with enjoying content that is available to you. The categorization interface will be able to deliver a great assistance to you with enjoying the content that you want to view with ease.
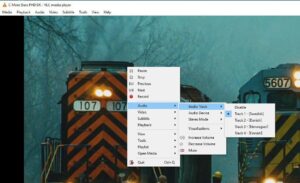
Buzz TV is compatible with EPG or Electronic Programming Guide as well. This can further deliver support to you with watching IPTV content. For example, you can easily see what the up are and coming television content available for you to watch at all times. Then you can stick to the schedule and get the maximum experience. You will also be able to ensure that you don’t miss out your favorite TV content as you are referring to the schedule.


Great Premium IPTV Subscription

Great IPTV is Premium IPTV provider with more than 12,000 channels and more than 9,700 VOD a private server using +10Gbps Network, we at Great IPTV are looking forward to Help All IPTV Users to enjoy their IPTV Subscription, we have Premium IPTV Subscription Which you can BUY Great IPTV Premium Subscription From Here

How to setup IPTV on Anroid & IOS using GSE IPTV App?

You can download this app via the link below:

Android devices:
https://apkpure.com/gse-smart-iptv/com.gsetech.smartiptv

iOS:
https://itunes.apple.com/us/app/gse-smart-iptv/id1028734023?mt=8

Step 1: Start by downloading the GSE IPTV App from Google Play Store and on the down right corner click on the yellow circle.

Step 2: Now select a name for your playlist and paste your M3U URL and click on “Add“.

Step 3: Now wait for the channels to be added to your application and this might take a little time depending on which countries or channels groups your M3U file contains.

Step 4: Now click on the playlist you just added in order to the see the channel groups.

Step 5: Now select the channel that you want to watch and click on “Play“.

Now you GSE Android app is ready for streaming IPTV channels on your Android device.


Great Premium IPTV Subscription

Great IPTV is Premium IPTV provider with more than 12,000 channels and more than 9,700 VOD a private server using +10Gbps Network, we at Great IPTV are looking forward to Help All IPTV Users to enjoy their IPTV Subscription, we have Premium IPTV Subscription Which you can BUY Great IPTV Premium Subscription From Here